22-Day Spring Cleaning Routine Week 3: The Living Room
Deep Clean Your Living Room
A living room always plays an important role in both family life and social activities. It’s a center of congregating, a space where you both relax and entertain. and it is where families tend to spend the bulk of their at-home time together (after the kitchen). So whether you’re entertaining guests, having a movie night with the family or working from home, your living room sees a lot of action! Chances are, because it’s one of the most seen and used space in your home, your living room is probably pretty tidy—at least on a surface level. But even the tidiest homes can use a good deep cleaning from time to time.
The Living Room Breakdown:
Polish to Perfection:
- Clean Coffee Tables
- Clean Couch and Chairs
- Clean Bookshelves and TV Stands
- Clean Floors and Rugs
Deep Cleaning Bonus Points:
- Wash Curtains, Drapes and Blankets
- Wash Windows and Windowsills
Sneaky Spots You Shouldn’t Forget:
- Clean Remote Controls
- Clean Ceiling Fans
- Clean Baseboards
- Clean Lamps and Knickknacks
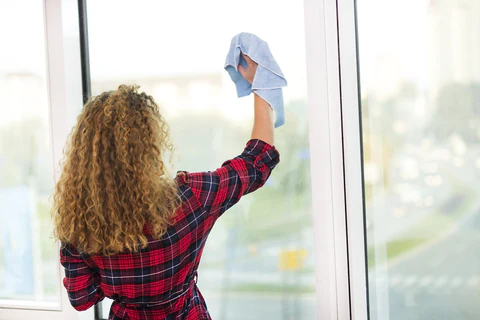
Day 10: Walls and Windows
We figured the best way to begin to tackle your living room is to start up high and work your way down so, when you’re done there shouldn’t be a speck of dirt or dust in sight!
To start vacuum your walls using a soft brush attachment. Make sure you run your brush along corners and baseboards and behind any furniture to suck up any cobwebs and dust bunnies. If you have overhead lights, ceiling fans, or air ducts and vents, carefully dust them as well. Don’t forget about any art you have hanging— if possible, gently remove your art and give it a good dusting, be sure to also dust the space where your art was hanging to pick up any lingering grime that might have been hiding behind it. Next take your vacuum and clean your windows, make sure you include windowsills, knobs and handles.
After you’ve dusted your walls and windows, it’s time to give them a good scrub! Using Boulder Clean’s Glass + Surface Cleaner and a microfiber cloth, clean the insides and outsides of your windows. If your windows have any high touch areas (locks or handles) you can hit them with a little Disinfecting Spray. Next, take down and rinse off the screens of the living room windows, if they’re extra dirty you can let them soak in a little warm water and liquid dish soap before rinsing and returning to the living room.
If you have kiddos, roommates or furry friends you’re probably used to dirt, fingerprints and maybe even snout or paw prints on your walls. To tackle those unsightly smudges, spray them with a little Boulder Clean All-Purpose Cleaner and using a soft sponge or rag, give them a gentle scrub. When using a rag instead of a sponge, make sure it is white to prevent any color from transferring to your walls. If after giving your walls a scrub, you notice that the dirt and grime hasn’t lifted, you can try using a little warm, soapy water. While you’re at it, don’t forget to wipe down your ceiling fan and baseboards. If you have little ones or pets, make sure you double check the lower areas of your walls that they might have easy access to.
Note: Be careful when cleaning framed art and photographs. Never spray cleaner or water onto the frame. The liquid can seep behind the glass and damage the pictures. Instead lightly wet a clean cloth to wipe the frame and glass.

Day 11: Coffee Tables, Clutter, TV Stands and Shelves
The easiest way to keep your living room looking and feeling clean, is to keep your clutter to a minimum. To start to declutter do a quick scan your living room, look at your shelves, on tv stands and coffee tables. If you see any obvious items out of place (dishes, papers, random books or cords and cables) immediately take them to the kitchen, your office or wherever their real “home” is. Once all the random items that have worked their way into your living room, are back where they belong, it’s time to clean!
Remove everything from your coffee table, tv stand (yes— the TV too!) and other shelves. Once your surfaces are clear, using Boulder Clean’s All-Purpose Cleaner or Disinfecting spray, wipe them down. Make sure you clean every inch, addressing any dust, sticky soda spots and lingering crumbs.
Before you return your items to their home, make sure they’re clean. If you need to, wipe them down with a disinfecting wipe or a little all-purpose spray. Pay extra attention to remote controls and video game controllers. If you are cleaning remotes, your television or other delicate items, make sure they are off, and that you don’t spray liquid directly on them to prevent causing any damage.
When you go to return your items, we recommend you follow these simple tips from Apartment Therapy to keep everything looking organized.
Group Like Things: Scattered collections run the risk of looking unkempt, but grouping similar objects is, again, purposeful and therefore looks orderly.
Place Things Neatly: This can make the difference between “put away” and not. Even if you store your shoes on the living room floor, they can look like they’re put away simply by putting them right next to each other, aligned, and in a designated spot. And if they don’t belong there but you’re doing a quick straightening up that doesn’t involve actually putting them away, the effect is the same.
Contain Small Décor and Knickknacks In A Tray: This gives the look of a cleared surface without actually requiring that everything be off of it. Even if you aren’t able to put everything in its place right away, stashing things temporarily on a tray gives a put-together appearance.
Get Acquainted With Knolling: If you leave things out on top of surfaces, grouping them on trays isn’t the only solution that looks neat and tidy. Try your hand at knolling, also colloquially known as flatlays.
Be Realistic About The Amount of Storage You Need: Rather than trying to cram things into storage that’s insufficient, set up your storage so that you can fill it with a little room to breathe. Get a few cubbies or invest in an extra floating shelf to keep things from getting too cramped.
Keep Surfaces Clear If Your Living Room Is Multi-Use: If your living room doubles as your home office or your kiddo’s classroom, keeping desks and other surfaces cleared instantly gives the impression of cleanliness, order, and being on top of it.

Day 12: Curtains, Drapes, Blinds and Throw Blankets
To make your room feel fresh and light, keep your curtains, drapes and blinds clean!
If you have plastic blinds, use an all-purpose cleaner or a little soapy water to give them a deep clean. For fabric curtains and drapes, take them straight to the laundry room, and wash with a powerful detergent according to the labels.
To make sure your throw blankets aren’t exposing you to allergens and microorganisms that could make you uncomfortable and even sick, we’re going to wash each and every one of them!
1. Gather and Sort All Your Blankets
First, gather your throw blankets from your living room and bring them all to your laundry area.
Sort your blankets by type. For instance, put all the kids’ small cotton blankets together and place all the giant fleece throws in one pile. Read care labels.
2. Shake Your Blankets
Shaking your blankets to remove any crumbs and debris keeps larger particles from clogging your washer. Grab each blanket or each set before they go in the washer. If possible, shake the blankets outside. If not, do it inside in an open space and vacuum immediately after shaking.
3. Wash On Delicate
Start by washing smaller blankets made of similar fabrics and colors together, if you have any such loads. Any blankets bigger than a twin bed size should be washed alone.
Follow these tips for extra clean blankets:
- Wash on the delicate cycle.
- Use cold water.
- Use only a small amount of detergent. You want to make sure all the detergent gets rinsed out or you could end up with a less soft blanket.
- Add an extra rinse cycle to further ensure all the detergent is washed out.
- If allowed by the care label, dry your blanket in the dryer. Use low heat.
- For delicate or “stretchy” blankets, you may want to dry partially in the dryer and then let it hang dry the rest of the way in order to avoid shrinking.
- Put delicate blankets or loosely knit ones in a large mesh bag.

Day 13: Couches and Chairs
If your living room is where you spend most of your time, chances are your couches and chairs have taken a beating. Between the accidental spills, toddler toes, puppy paws and the general wear and tear associated with everyday use, it’s about time you give your seating a little love.
To start remove all of the cushions from your couches and chairs, using a vacuum cleaner hit all the cracks and crevices. While you’re cleaning, check to make sure none of your missing items have found their way into the abyss of the couch.
Next, clean your slipcovers, and accent pillows. If your upholstery is machine washable, use a powerful detergent and wash and dry according to your label. Or, if you have an upholstery attachment on a rug shampoo machine you can use it to clean extra soiled couches and chairs. If your couch cushions and pillows are not washable, and you do not have a rug shampoo machine you can always use a little warm soapy water to spot treat. If you are spot treating, make sure you test this method in an inconspicuous spot before tackling the rest of the couch.
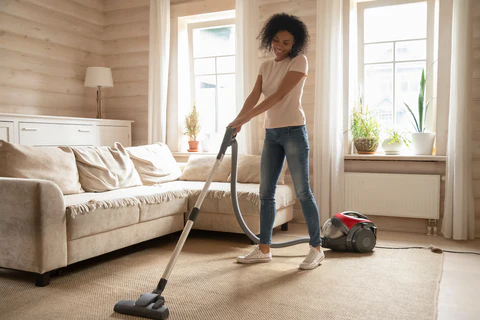
Day 14: Floors, Carpets & Rugs
Now that we’ve tackled everything up high, it’s time to tackle the “lowest” part of the room—your floors, carpets and rugs.
To start, give your floors a good sweep or vacuum. To make sure you’re getting the cleanest floors possible, try get under tables, chairs and other furniture—this might require a little temporary rearranging. Once you’ve given your floors a once over, it’s time to bust out the heavy duty cleaners!
For hardwood floors, use Boulder Clean’s Wood Floor Cleaner. Squirt directly onto clean, swept floor in 3-foot sections. Mop with long, even strokes and repeat until you’ve covered each section of your floors. To avoid streaking, rinse cleaning pad often with fresh water. Once you’re finished your wood floors should look and feel brand new!
For surfaces like ceramic tile, stone, bamboo, vinyl, laminate and other sealed floors, use Boulder Clean’s Multi-Surface Floor Cleaner. You can clean these surface similarly to how you’d clean wood floors. Squirt the multi-surface floor cleaner directly onto clean, swept floors in 3-foot sections. Mop with long, even strokes and repeat until you’ve covered the entire room.
Carpet can be a little tougher to clean. First, you should thoroughly vacuum carpeted surfaces, making sure to suck up all the dirt and debris possible. Next, spot treat any stains with a mixture of soap and water or carpet stain remover. Take care to blot, not rub, which can damage carpet fibers. Try to avoid walking on your carpet until it is full dry. For extra soiled carpets that need a deep clean, we suggest renting a carpet cleaner, or even calling in the professionals!
Area rugs can also be a little tricky to clean. So, we recommend following Architectural Digest’s Easy 9-Step Guide below!
1. Gather Your Tools and Supplies
Here’s exactly what you’ll need to have on hand to complete a successful area rug cleaning:
- Rug shampoo (or Boulder Clean Liquid Dish Soap)
- Bucket
- Soft-bristle brush or sponge
- Water
- Vacuum
2. Remove Dirt and Debris
Thoroughly vacuum on the rug on both sides. You want to make sure every last bit of debris is gone. If you have pets, use the brush attachment to get any lingering stray hairs.
3. Mix Your Cleaner
When it comes to the actual cleaning solution, you can use a rug shampoo. Whatever shampoo you choose, follow its specific directions (found on the bottle) for mixing.
Alternatively, you can also use mild dish detergent mixed in a bucket with warm water. Do not use hot water as it can shrink the rug or cause fading.
4. Do a Color Test
Before you start scrubbing, make sure the cleaner doesn’t cause the colors to run. Test the solution on the corner of the rug to make sure it is colorfast. If the color doesn’t bleed, it’s safe to move on to the next step.
5. Wash the Rug
Using a sponge or soft-bristle brush, work the cleaning solution into a lather on the rug. Let the cleaner sit on the rug for a five minutes before you start rinsing. Anything less than that and you’ll shortchange the cleaning process. Give it those five minutes to set in and start lifting away dirt.
6. Rinse the Rug
Rinse the soap out of the rug using a garden hose or buckets of clean water. Make sure all the cleaning solution is completely removed from the area rug and the runoff water is crystal clear.
7. Remove Excess Water
At this point, you’ll want to get rid of as much excess water in the rug as you can so it will dry faster. You can use a wet-dry vacuum if you have one, or use a squeegee in the direction of the nap.
8. Let the Rug Dry
The next-to-last step to clean an area rug is simply letting it dry. Lay the rug flat and allow the top of the rug to dry completely. Then, flip it over to let the bottom side dry. Fans can help speed up the process. Make sure the rug is fully dry before you return it to the room.
9. Vacuum or Brush Out the Rug
During the cleaning process, threads and fibers can get compacted and squished. Revive them by running a vacuum over the now-dry rug, or brush them with a soft-bristled brush.
Now you’re finished, and can enjoy your freshly cleaned carpet. You know how to clean an area rug yourself, and you can complete the job whenever you like!
Time For A Break!
That completes Week 3 of our 22-day Spring Cleaning Checklist! Your living room should be feeling and looking extra bright and organized. Take some time to unwind this weekend and enjoy your clean space! Curl up on your couch with fluffy, fresh blanket and a good book, have a game night or start a puzzle! And get ready, next week we’ll be heading to one of the toughest rooms to clean—the kitchen!