22-Day Spring Cleaning Routine Week 4: The Kitchen
Deep Clean Your Kitchen
It’s time to tackle the one room in your house that sees the highest amount of traffic—the kitchen! Between fun family pizza parties and burnt dinner disasters your kitchen sees a lot of ups and downs and more importantly A LOT of messes, which naturally means it’s in need of some serious deep cleaning!
The Kitchen Breakdown:
Polish to Perfection:
Clean Countertops
Clean Cabinets and Drawers
Clean Appliances
Clean Floors
Deep Cleaning Bonus Points:
Organize Utensils and Accessories
Declutter Pantry
Sneaky Spots You Shouldn’t Forget:
Clean Trash Can & Recycling Bin
Clean Kitchen Sink and Garbage Disposal
Clean Hoods and Fans
Clean Anti-Fatigue Mats
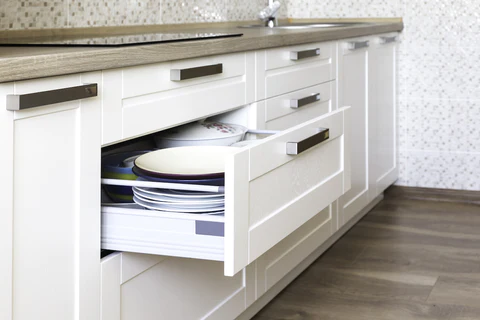
Day 15: Cabinets & Drawers
This week, we’re starting off strong with a hefty (but beyond necessary!) assignment—kitchen cabinets and drawers.
Your cabinets and drawers see a lot of daily use. Between the rogue food splatters and fingerprint buildup, your cabinets and drawers NEED to be deep cleaned.
According to The Spruce, unclean kitchen cabinets and drawers could pose a health risk: Bacteria like salmonella can easily contaminate handles and knobs. Plus, grime and old food particles not only attract bugs and rodents, but in general they have no business building up where we store the items we cook and eat our food with…
Start by removing everything from your cabinets and drawers. Now is a great time to do a quick 20 minute declutter and rid your kitchen of any duplicate utensils (do you really need three can openers?), small unused appliances (how many times have you used that cotton candy machine?) or damaged dishes (no one likes eating off of a cracked plate!).
Next using a handheld vacuum or a hose attachment, catch any dust bunnies that might have found their way into your cabinets and drawers, and suck up any cookie crumbs or other food particles you see.
If your cabinets and drawers are decently clean, you can simply give them a spray with Boulder Clean’s Disinfecting Spray or All-Purpose Cleaner, don’t forget to hit your handles and knobs! If you have stainless hardware on your cabinets and drawers, for an extra shiny finish you can follow up with a little spritz of Boulder Clean’s Granite + Stainless Cleaner and a quick wipe down with a microfiber cloth.
Your dirtier cabinets and drawers, will require a much deeper clean. We’ve taken a cue from Better Homes & Gardens and broken down a few common stains your drawers and cabinets might see, and how best to clean them.
Fingerprints: The oily residue on fingers can leave behind unsightly marks on drawers, cabinet doors and hardware. Cleaning kitchen cabinets with vinegar will easily remove fingerprints. Dampen a cloth with Boulder Clean’s All Purpose Cleaner or a 50-50 solution of water and vinegar, apply to the prints, and buff clean with a polishing cloth.
Grease: Cabinets and drawers directly above or next to the range are most prone to grease stains. Just like oil-based fingerprints, you can clean greasy kitchen cabinets with Boulder Clean’s All-Purpose cleaner or a little diluted vinegar. Since these stains are likely larger than a fingerprint, you might need give them a good scrub to fully get rid of grease on cabinets and drawers.
Food splatters: Maybe a squirt of ketchup landed in the wrong spot or a countertop spill trickled down to the base cabinets and drawers. Whatever the scenario, wipe up food messes as soon as possible before cleaning kitchen cabinets and drawers with baking soda or an all-purpose cleaner. Especially if you’re working with a porous material, like wood, you don’t want to give the stain a chance to set in. As soon as you notice spills, wipe up as much of the residue as you can with a damp cloth. Then, spray with Boulder Clean All-Purpose cleaner, or apply a paste of baking soda and water to the spot. Let sit for a few minutes, then wipe away. Polish the area with a clean cloth.
Water stains: If you have hard water, water stains on cabinets and drawers can be a common problem when cleaning your kitchen. The best way to prevent water spots is to switch tap water for distilled water whenever you clean your cabinets and drawers.
Scuffs: Remove scuffs caused by shoes, tables, or chairs with a soft eraser. Gently rub the eraser along the mark, then wipe away residue with a clean cloth and a little all-purpose cleaner. This trick is especially handy for white kitchen cabinets.
Once your cabinets and drawers are clean, return your dish ware and appliances neatly. As you’re returning your items, if you notice any dusty plates or dirty silverware, immediately put them in the dishwasher and run a cycle using Boulder Clean’s Dishwasher Detergent Power Packs.

Day 16: Appliances
Today’s assignment is arguably the toughest out of our entire spring cleaning checklist, it’s time to tackle your appliances. Inside and out, top to bottom, today we’re cleaning every stain, spill and fingerprint lingering on the stars of your kitchen.
Fridge
Remove all food items from your fridge—now is the time to start fresh so toss any expired, empty, unusable, or disliked items. Also be sure you take out any removable drawers and shelves. Using a non-toxic cleaning spray, like Boulder Clean Disinfecting Spray or All-Purpose Cleaner, wipe down the inside of your refrigerator. To clean shelves and drawers, you can also use spray, or if your drawers and shelves are extra dirty and sticky, you can use Boulder Clean Liquid Dish Soap and warm water to give them a good scrub! Be sure all surfaces are dry and any remaining spray is wiped away. Replace your shelves and drawers and return your food items to the refrigerator. After you’ve cleaned the inside of your fridge, it’s time to tackle the outside. If you have a stainless refrigerator, you can use Boulder Clean Granite + Stainless Cleaner for extra shine and protection, we also recommend hitting the high touch areas (think the handle, water/ice dispensing buttons etc.) with a little disinfectant!
Microwave
If you’re not cleaning your microwave on a regular basis, it’s time to start! Over time your microwave handle and buttons will see a buildup of grime, and the interior will likely have a buildup of food splatter, crumbs, and even unpleasant smells! To clean your microwave use Boulder Clean Disinfectant or All-Purpose Cleaner. While cleaning the exterior, if you’re concerned about liquid seeping into the buttons, you can spray disinfectant directly on a cloth, and then wipe it down. For the interior, you spray disinfectant directly on to the bottom surface. For the top and sides, it’s best to spray on a cloth first, before wiping up stains and splatters. Most importantly, make sure you’ve wiped all the disinfectant out of your microwave, and that it is fully dry before using.
Oven
Most ovens have a self-clean mode, however we recommend only using the self-cleaner if you frequently clean your oven, and if it’s only been a few weeks since your last clean. Self-cleaning ovens are great in theory, but they don’t always do a great job and if your oven is particularly dirty they can even start fires, so we suggest doing the scrubbing on your own. While there are a few oven-specific cleaning solutions on the market, we generally tend to avoid them because they often contain chemicals that aren’t so great for you, your home or the planet. So, to be on the safe side try cleaning your oven with with a more natural solution! We suggest either the baking soda and vinegar method, or the lemon method!
How to Clean Your Oven With Baking Soda and Vinegar
Step 1: Remove everything from your oven—racks, pizza stone, thermometer, etc.
Step 2: Lay out newspapers or paper towels on the floor beneath your oven.
Step 3: Grab a small bowl and mix a 1/2 cup of baking soda with 2 to 3 tablespoons of water. Tweak the ratio until you have a spreadable paste.
Step 4: Put on your gloves and using your fingers, or a medium sized paintbrush, spread the paste around the inside of your oven, covering the back, sides, bottom, top, door, corners and crevices. If you have an electric oven, don’t put paste on the heating elements. If you have a gas oven, don’t put the paste where the gas comes through. Close the oven when you’re done.
Step 5: Allow paste to sit for 10 – 12 hours, or overnight.
Step 6: In the meantime, place racks in your kitchen sink (or bathtub, if you have extra large racks), allow them to soak in a mixture of dish soap and hot water. If they are extra soiled, you can sprinkle baking soda on your racks and then pour vinegar on top. This combination will foam. When the foaming stops, plug your sink or tub and run hot water until the racks are fully covered.
Step 7: Allow racks to soak for 10 – 12 hours, or overnight.
Step 8: After 10 – 12 hours, put on your gloves again and taking a damp cloth rag, open the oven and wipe down all surfaces. If there are extra sticky spots, use a wet scouring pumice, microfiber sponge, or other abrasive tool to remove all grime.
Step 9: If there are chunks of paste that won’t come off easily, put some vinegar in a spray bottle and spray it on the chunks. The vinegar will react with the baking soda and foam. Take your damp cloth again and wipe off all foam.
Step 10: Remove racks from the water and scrub with a cloth rag until all grease and grime is gone. Use the pumice or microfiber sponge on any tough spots.
Step 11: Dry racks and place them back in the oven.
How to Clean Your Oven With Lemons
Step 1: Fill a medium-sized, oven-proof mixing bowl with water. Cut two lemons in half and place them in the bowl.
Step 2: Heat your oven to 250 degrees.
Step 3: Once heated, place the mixing bowl inside on one of the racks. Leave for one hour.
Step 4: After an hour, turn off the oven, open the door and let it cool slightly.
Step 5: While the oven is still warm (but cool enough that you could safely touch the inside without getting burned), put on gloves, take a damp cloth and wipe down all surfaces, including the back, sides, bottom, top, door, corners and crevices. If needed, use a wet scouring pumice, microfiber sponge or other abrasive tool to target any extra sticky spots. Be sure to wipe thoroughly so that you remove all grease and grime.
To clean the exterior of your oven, use Boulder Clean’s All-Purpose Cleaner or Granite + Stainless Spray and a microfiber cloth!
Dishwasher
There are a lot of methods to cleaning your dishwasher, but our favorite is a multi-step method that will cover any and all areas (even those that are usually overlooked), leaving you with a squeaky-clean dishwasher!
Step 1: Clean the Door
Keep the dishwasher door fingerprint-free by wiping the outside with Boulder Clean’s Granite + Stainless Cleaner or Disinfectant. Avoid scouring pads that might scratch the dishwasher’s finish. When the door is clean, wipe it dry with a soft cloth. Wipe away tricky fingerprints and smudges with a little dish soap and water.
Open the dishwasher door so you can get at its top and sides. Dip a small toothbrush in hot, soapy water, and scrub around the door. Make sure you dig into the grooves of the rubber seal and any other crevices, including the hinges. Wipe up the resulting grime with a household sponge dipped in hot soapy water. Wipe away any cleaning solution left behind with a clean, wet sponge.
Step 2: Clean the Tub
Before you start cleaning the tub, use a handful of paper towels to grab any debris from the base of the dishwasher. You’ll find most of the debris around the drain. Once the debris is removed, you’ll want to run a cycle to clean the dishwasher. (It should be run empty.) You can use one of several DIY dishwasher cleaners. Here’s how to clean a dishwasher with vinegar: simply set a dishwasher-safe cup of plain white vinegar on the top rack. Then run a full cycle, choosing the hottest water possible to disinfect the unit while it’s being cleaned. When the cycle is done, wipe out the inside of the dishwasher with paper towels or a clean, dry cloth.
Step 3: Clean the Accessories and Parts
Next, clean the dishwasher accessories and parts. Take out the racks and utensil holders. Wipe off any stuck-on food particles or other debris. Scrub the spray arm with a soft brush or toothbrush to remove clogs.
Step 4: Clean the Dishwasher Filter
To access the dishwasher filter, pull the bottom rack all the way out. The filter is usually located in one of the bottom, back corners of the appliance. If your filter is removable, twist to remove it from the dishwasher and rinse under hot running water to remove food particles and other debris. Wipe out the area beneath the filter inside the dishwasher with a damp cloth, sponge, or toothbrush. Once clean, add the clean dishwasher filter back into place.
Note that filters vary greatly across appliances. Refer to your owner’s manual for specific instructions on how to clean your dishwasher filter.
Day 17: Countertops, Sinks and Disposals.
Because you are likely already wiping your countertops down after every meal you cook, today should be fairly easy!
If you haven’t wiped your countertops down today, hit them with Boulder Clean’s All-Purpose Cleaner. If it’s been a few days since you’ve last cleaned your countertops and you notice some build up, you can use a little dish soap, warm water and a sponge to tackle the tougher messes, then to be on the extra clean side, we recommend following up with Boulder Clean’s Disinfecting Spray or Disinfecting Wipes.
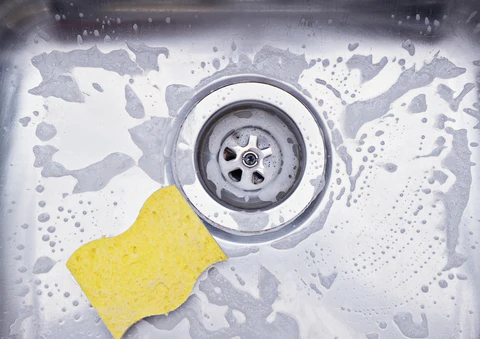
Now on to the sink! It’s easy to assume that because it’s constantly seeing a mixture of soap and water that your sink is relatively clean. Unfortunately, that’s not the case! Your kitchen sink is by far one of the dirtiest places in your home. Not only do the pipes under your sink become filled with germs that can make their way back up to the surface, but your sink regularly comes in contact with raw meat, unwashed produce, sponges and other objects that are teeming with some seriously yucky bacteria. To give your sink the deep clean it needs, start by making sure it is clear of dishes and any leftover food bits that didn’t make it down the drain. Next give it a good spray with Boulder Clean’s Disinfecting Spray. Allow the spray to sit for at least 10 minutes before scrubbing with a sponge and wiping clean. Make sure you hit the faucet, handles and every corner of your sink basin!
Next, you’ll want to clean your garbage disposal to get rid of any grime and smells that might be building up! Green-cleaning expert Leslie Riechert suggests the easiest way to clean your garbage disposal, is to place frozen orange and lemon peels in the disposal and grind them up. The oil from the citrus peels will help remove buildup while leaving behind a clean, fresh fragrance. No peels on hand? You can also use a tray of ice cubes and ½ cup of baking soda to clear buildup from the blades!

Day 18: Pantry
Throughout the year, our pantries can easily become a blackhole of spices, flours, oils, snacks, canned goods and who knows what else! So, there’s no better time to get your pantry back in order than today!
First things first, remove all food from your pantry. While you’re taking everything out, try to group all of your items into categories. Once you’ve paired all like-items, you’ll be able to clearly see duplicates, nearly-empty bags, and stale snacks making it easier to purge your pantry and keep your food current. While you’re editing the contents of your pantry, be on the look-out for non-perishable items that you no longer want or need, and set these aside to donate to your local shelter or soup kitchen.
Now, get cleaning! Using a clean cloth or sponge, wipe down your pantry shelves with soapy water, or a little all-purpose cleaner. Remove any racks or drawers associated with these areas and wash them in the sink. Make sure everything has dried thoroughly. Before you replace your food and any storage containers, wipe off any grime, grease or dust with a warm, soapy dish cloth. As you replace all your food items, make sure you are keeping them organized. Store like items together, label and date containers, and place items you need to use first, towards the front of your pantry.
And finally, take a step back and admire your hard work! We truly believe there is nothing better than a freshly cleaned and organized pantry!
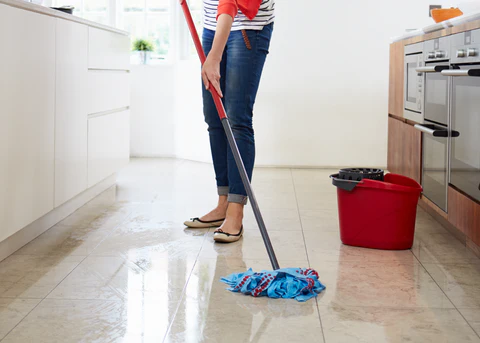
Day 19: Floors
For the final day of Week 4, we’re ending with an assignment you should be a pro at by now—cleaning the floors!
Start by moving everything off the floor. If you have anti-fatigue mats or small rugs in your kitchen, take a moment to throw them in the washing machine with a powerful detergent to really help get all that gunk out!
Next, take your garbage and recycling cans out. Throw your trash and recycling in their designated bins and using a garden hose, a little dish soap, and a sponge, spray and scrub the inside and outside of your cans. This should help remove any stuck food or sticky spots. After you’ve rinsed them clean, let them dry. Then, spray the inside and outside liberally with Boulder Clean’s Disinfecting Spray. Allow the spray to sit for at least 10 minutes before wiping clean.
Meanwhile, in your kitchen do a once over the floors with your broom or vacuum. Be sure to get under and behind appliances. Then using either Boulder Clean’s Wood Floor Cleaner, or Multi-Surface Cleaner, give your floors a solid scrubbing. Squirt the cleaner directly onto your floor in 3-foot sections. Using a clean Mop, scrub your floors with long, even strokes. Repeat until your floor is fully cleaned. To avoid streaking, rinse your cleaning pad often with fresh water.
Once your floors are clean and dry, you can return stools, trash cans and kitchen rugs to their home!
That completes Week 4 of our 22-Day Spring Cleaning Checklist! We’ve only got one (very short!) week left of assignments before we’re totally finished with our big spring cleaning project. Now, it’s time to celebrate your clean kitchen! We recommend cooking a delicious meal and sipping on a big glass of wine.