Going Green. What It Means And Why You Should Make The Change!

What Does Going Green Mean?

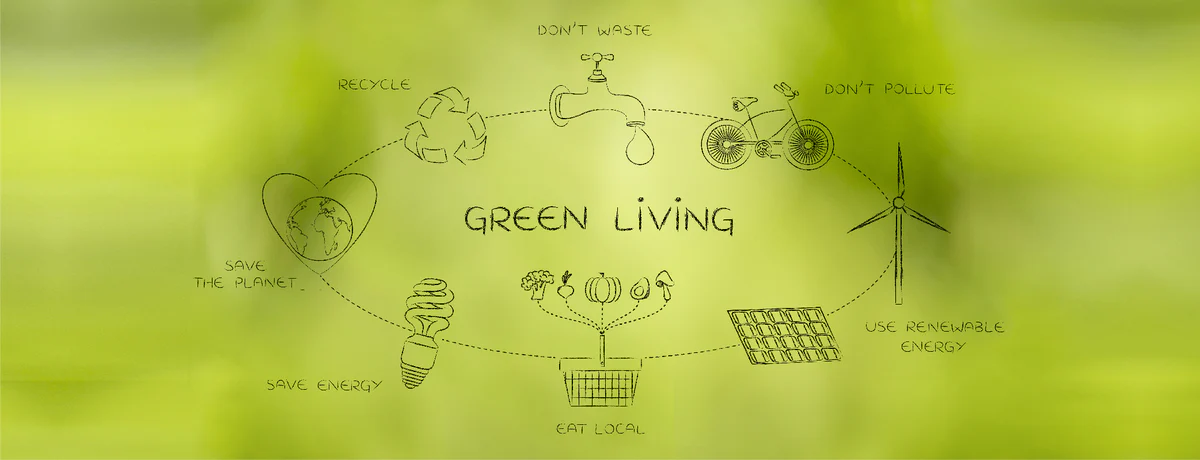
Going green means implementing certain lifestyle changes designed to help you live in a more eco-friendly way. It means becoming more environmentally aware and changing your behavior and lifestyle to reduce the amount of pollution and waste you generate.

The decision to go green is a gradual process for most people. Any action you take that contributes to sustainable living makes a positive impact on the environment. Everyone can implement small changes into his or her current lifestyle to make a difference for the Earth and future generations.

Why Go Green?

While most people are aware that going green is good for the Earth, they may not fully understand the extent of its impact. Going green leads to a healthier lifestyle, a cleaner environment, it saves you money and is good for your children’s future. The green initiative is about conserving resources so that your needs and the needs of future generations can be met.

How To Go Green

Going green is often simply a matter of replacing old habits with new ones. Each time you make a conscious decision to conserve natural resources, you take another step toward green living.

  1. Turn Off Lights
  2. Switch off lights as you leave a room, which saves energy and reduces your electricity bill.
  3. Set Your Thermostat
  4. Set your thermostat above 78 degrees Fahrenheit in the summer and below 60 in the winter. Wear less clothing in summer and more in winter. Open windows rather than running the air conditioner, if possible.
  5. Conserve Water
  6. Take shorter showers. Turn water off while brushing your teeth or shaving. Fix leaky faucets. Run your dishwasher and washing machine only when you have a full load.
  7. Recycle
  8. Recycle aluminum, cardboard, glass and plastic materials if possible. By doing so you reduce the amount of waste headed to landfills.
  9. Reuse
  10. Find ways to reuse things that cant be recycled rather than throwing it away. Old clothing can be used as rags. Large containers can be turned into planters. Consider donating large items you no longer want or need.
  11. Change Your Light Bulbs
  12. Switch to compact fluorescent bulbs which last longer and use less energy.
  13. Bring Your Own Grocery Bags
  14. Reduce waste by bringing your own grocery bags to the store to use again. Purchase reusable cloth grocery bags to keep in your car for trips to the store.
  15. Eat Greener
  16. Support locally grown produce which reduces greenhouse emissions by reducing the demand for shipments of processed food products.
  17. Buy Local and from Eco-friendly Brands
  18. When you buy local, you are not only supporting local farms and businesses, but you are supporting the global environment by reducing shipping fuels from foods and supplies that have to travel long distances.
  19. Carpool, Bike or Bus
  20. Carpool with your co-workers, or walk or take your bike when weather permits.
  21. Familiarize yourself with your city’s public transportation and bus systems. You’ll cut your gas bill and reduce your car emissions.
  22. Unplug
  23. Even when appliances are turned off they continue to draw electricity. Unplug seldom-used appliances or plug related appliances into a power strip to turn off when finished using them. Unplug electronic chargers when not in use.

What is the Difference Between Going Green and Sustainability and Eco-Friendly?

Many people confuse going green, sustainability, and eco-friendly — but the differences between the three aren’t so difficult once you look into it.

Simply put:

  1. Going green refers to all aspects of environmentally-friendly products from fashion to buildings to the movement as a whole.
  2. Eco-friendly means that a product, practice, or activity won’t harm the environment.
  3. Sustainability means that what we do today doesn’t deplete resources for future generations.

Buying Green vs Buying Sustainable

Some products may be considered green due to their makeup, but they may not be considered sustainable due to their production.

For example, a product made from renewable sources such as a wooden hairbrush is considered green, however if a life-cycle analysis of the production process showed that it takes a lot of energy to manufacture and ship and there is no way to properly dispose of the hairbrush when you are finished, it is not sustainable.

Ideally, you should try to find brands and products that are both green and sustainable.

Being eco-friendly means thinking about the ecology of the earth and making sure the products you consume, and the practices you keep, have a minimal impact on the earth itself.

Eco-Friendly Products

Many products will be labeled as eco-friendly, but what exactly does that mean? First of all, the products should be non-toxic. This means that they are made without toxic materials or toxic pesticides and herbicides. Eco-friendly products may be made with recycled materials such as glass, wood, metal, or plastics that have been broken down from a wasted item and reconstituted into something new.

Eco-friendly products should contain ingredients that were sustainably grown or manufactured — which means to be done so with minimal damage to the earth and community where they come from.

Clean vs. Nontoxic vs. Organic

This one is also simple once you learn that “clean” means free of chemicals or materials that are synthetic, and are usually natural ingredients only.

Non-toxic means something does not contain chemicals or materials that are harmful to humans or the environment.

Organic means ingredients are grown without pesticides or herbicides. Organic products have a rigid certification process that varies by country, however the other two claims, clean and non-toxic, do not.

Greenwashing

Unfortunately, some companies participate in “greenwashing” which is to label a product as “eco-friendly” or “environmentally friendly” without doing due diligence to make sure that is correct.

Other companies may produce “eco-friendly” products to cover up other not eco-friendly practices within the supply chain. To avoid falling for this, make sure to thoroughly research a brand before you buy. Don’t just believe labels unless they are certified statements.

Final Note

Without green and eco-friendly products and practices, the earth will suffer; and without sustainable activities, we may deplete resources.

Cleaning With Conscience

What is Conscious Cleaning?

It’s about integrity and intentionality. Conscious cleaning. It’s a buzzword that’s been discussed increasingly over the last few years as we’ve become more mindful about consumption. But what does the term mean? Like “clean” and “sustainable,” conscious cleaning doesn’t have a set definition.

At Boulder Clean, we’ve adopted the philosophy that it’s about applying a more thoughtful approach to our cleaning routines. It involves taking a closer look at a brand’s actions and core beliefs to ensure they align with our values. 

Our Values

Inclusivity: Representation matters, and it should be a priority for everyone in beauty. To be a conscious beauty brand, you must include all races, cultures, gender identities, sexual orientations, ages, body types, and abilities. BC celebrates diversity across all areas—from their marketing visuals to in-house staff.

Sustainability: Conscious cleaning brands do everything in their power to make the most ethical choices across ingredients and packaging. Sustainable packaging is a very nuanced conversation, but we appreciate brands doing what they can to reduce waste and their impact on the environment. Using recycled materials or refillable packaging are just a few steps we love to see brands taking. Use FSC-certified cartons made with paperboard from responsibly managed forests. Boulder Clean is committed to no single-use plastic by 2025.

Ingredients and Ethical Sourcing: Boulder Clean uses the most ethical choices across ingredients. We Refuse to use over 2500 ingredients that are harmful to either our person or our environment. Our refuse to use list has grown over the last 7 years as ingredients have been created or recognized as harmful, and it will continue to evolve for the same reason. Our products bring our consumers the most effective natural home cleaning solutions possible with Safer Choice Certified chemistry.

Transparency: When it comes to each product we use, we want to know who makes it, what it does, when it was made, where the ingredients come from, and why the brand created it. Boulder Clean shares answers to these questions on our website to encourage free-flowing communication.

Impact: We want to spend money with brands making an impact outside of the cleaning industry. Some brands have committed to making a difference by using their platform to amplify causes connected to their values.

Brand Story: No one wants to support a brand with no personality or purpose. We prefer to champion brands that fulfill an undeniable need in their category and have a sincere founder at the helm. When a founder’s reason for starting their brand resonates with us, it allows us to establish a connection that extends beyond the products.

How Green is Your Clean?

Cleaning and doing laundry can sometimes expose us and the environment to unnecessary toxins. Traditional cleaning products and laundry detergents are filled with chemicals that can irritate the skin and respiratory system, while also causing harm to the environment when they are washed down into the sewer systems. Luckily, there are choices you can make to avoid these potentially harmful cleaning products to keep you and the earth safe.

How To Make Environmentally-Conscious Cleaning Choices

Buy safer Cleaning Products: Look for “Safer Choice” labels established by the U.S. Environmental Protection Agency (EPA) for products that have safer chemicals. There is also “Green Seal” certification which identifies the product as environmentally-friendly with natural ingredients.

With the right mindset and the right products, cleaning can become a treat rather than a chore.

Is It Better To Use The Dishwasher Or Hand-Wash Your Dishes?

We’ll start with this: There is most definitely a wrong way to wash dishes, and chances are, you’re guilty of it. Generally, people are not efficient dish washers. If you let the hot water run, sending it past the dishes and down the drain, that’s certainly the wrong way. Measured against that kind of water-wasting hand washing, your dishwasher will usually be the more environmentally-friendly option.

However, that whole notion goes out the window if you’re a habitual pre-rinser of dishes. If you pre-rinse, then put them in the dishwasher, and have to put them through again when that casserole dish comes out of the dishwasher still crusted with baked-on eggs and cheese, then the efficiency level of machine-washing can significantly plummet. Note: Dairy, eggs, and oils are notoriously tough to wash away in the dishwasher.

Dishwashers

Dishwashers are one of our favorite inventions—most of us would openly admit that it would be hard to live without our dishwashers. These appliances make one of the most tedious tasks for the home less stressful and more convenient. But dishwashers come with problems of their own and it’s crucial to use them properly, not just for the sake of getting dishes as clean as possible, but also to keep your dishwasher working for as long as possible.

You have to use it right or it could cost you time, money, and energy.

Pre-Rinsing Dishes

Pre-rinsing can be a hard habit to break, but it turns out, you aren’t supposed to pre-rinse your dishes after all. According to the manufacturer’s instructions on modern dishwashers, dishes shouldn’t be rinsed before being loaded. Efficient machines, combined with good dishwasher detergent, actually work better with a bit of grease. However, this doesn’t mean you should just put dinner plates straight from the table, directly into the dishwasher. It’s crucial to remove excess food scraps or sauces: You should do a quick wipe to get off loose food.

But, skip the sink. Save time, water, and energy, and just pop those coffee cups straight into the dishwasher.

Washing Things in the Dishwasher that You Shouldn’t

Not everything is designed to be cleaned in the dishwasher. Plastic, melamine, fine china, and crystal usually aren’t dishwasher-safe. While your dishwasher might have a china or delicate setting, it can still be risky. So, check the bottoms of your plates and cups for directions. If you’re still not sure, err on the side of caution and hand-wash.

Related: 10 Things You Probably Didn’t Know You Can Clean in Your Dishwasher

Loading Dishes the Wrong Way

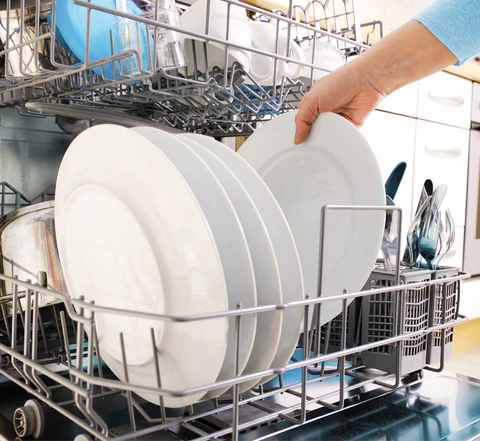
Technically, there isn’t a right or wrong answer here, because the best way to load the dishes can also depend on how a dishwasher’s rack is designed. But having a system for loading dishes can save time and energy. For example, loading glasses from back to front so you can quickly see if there’s room to fit that one last mug in. We also suggest loading larger dishes, like dinner and salad plates, toward you. This gives the sprayer plenty of room to work, which can be compromised when the dishwasher is overcrowded with randomly placed and stacked dishes.

Having a system also makes the unloading process a less arduous task. An organized dishwasher makes unloading the dishes easier! When all of the like items are grouped together when loading, unloading and putting away is quick.

Using the Wrong Rack

If you’re not sure where to place things in the dishwasher, especially plastic, flip it over and see if there are manufacturer’s instructions. If there are no instructions, generally, plastic food storage containers, glasses, mugs, small bowls, and top-rack-safe-only items go on top. We also recommend using the top rack for long serving pieces and knives. Plates, large bowls, and casserole dishes should go on the bottom rack.

Inserting Utensils Incorrectly in the Utensil Basket

Handles up or handles down? Turns out, this is largely based on personal preference, but there are some rules of thumb to follow. This is pretty definitive for homes with children or where the little ones help out by unloading the dishwasher. After all, you don’t want them to grab onto knife blades or fork prongs and get injured. We will also note that pointing your items down—with their handles up—is the more hygienic method. You won’t handle the part of your spoons and forks that will eventually go in someone’s mouth. The only downside of this approach? The more utensils you pile into the flatware holder in your dishwasher, the more crowded the space will be. Best washing results are obtained when the silverware is mixed and evenly distributed, not nested together. Don’t group cutlery of the same type together. Separating silverware so that forks, knives, and spoons are mixed and evenly distributed allows the water to pass through each utensil more easily, resulting in a cleaner result.

If your dishwasher has a separate utensil rack, use the designated slots in your machine’s to prevent forks, knives, and spoons from sticking together; this will also keep them free of any water marks. And while rusting is uncommon, actively ward it off it by adding any silver-plated silverware and stainless-steel cutlery to separate compartments. When different metals are placed next to each other, contact corrosion can happen, which can cause metals to rust.

Using Too Much Detergent

Tempted to add some extra detergent in the tray? This actually won’t get your dishes any cleaner. In fact, residue from excess dish soap can leave your dishes gritty. Even worse, too much soap can cause the suds to overflow some machines. This can potentially lead to expensive repairs. So, avoid temptation and opt for a pre-measured pack, or just be sure to stay under that maximum fill line when loading your dish detergent gel.

Failing to Clean and Maintain the Dishwasher

Like any other appliance, properly maintaining a dishwasher is essential. If your dishwasher has a filter, it’s important to clean it regularly. You should also keep your eyes out for things like seeds or food scraps that didn’t get scraped away at the bottom of the dishwasher and remove them as soon as possible.

Related: Dishwasher, Meet Vinegar.

Hand Washing

Hand-washing your dishes the correct way, you might come out slightly ahead of the energy-expenditure game—only because you’re using human energy to dry the dishes rather than the heat cycle on your dishwasher.

That said, there is one definitive reason for picking up a sponge: The dishwasher wasn’t designed to wash every single item in your kitchen. In fact, you could ruin certain kitchen tools by running them through it. We’ve made a list of items you should never put in the dishwasher—not even on the rinse cycle.

  1. Kitchen Knives
  2. Certain Plastic Items
  3. Nonstick, Copper and Aluminum Cookware
  4. Fine China and Crystal
  5. Wooden Kitchenware (Including Cutting Boards)
  6. Anything Cast Iron
  7. Insulated mugs and containers.
  8. Silver
  9. Hand-painted ceramics and stoneware
  10. Acrylic dishware
  11. Pressure cooker lids
  12. Gold-colored flatware

And if you live alone and you have a rotation of the same three to four dishes each day, using a dishwasher might not even make sense – unless you don’t mind using it sporadically.

How-to for the greenest-possible hand-washing?

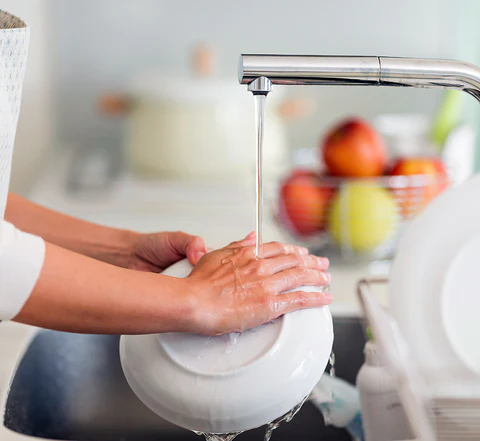
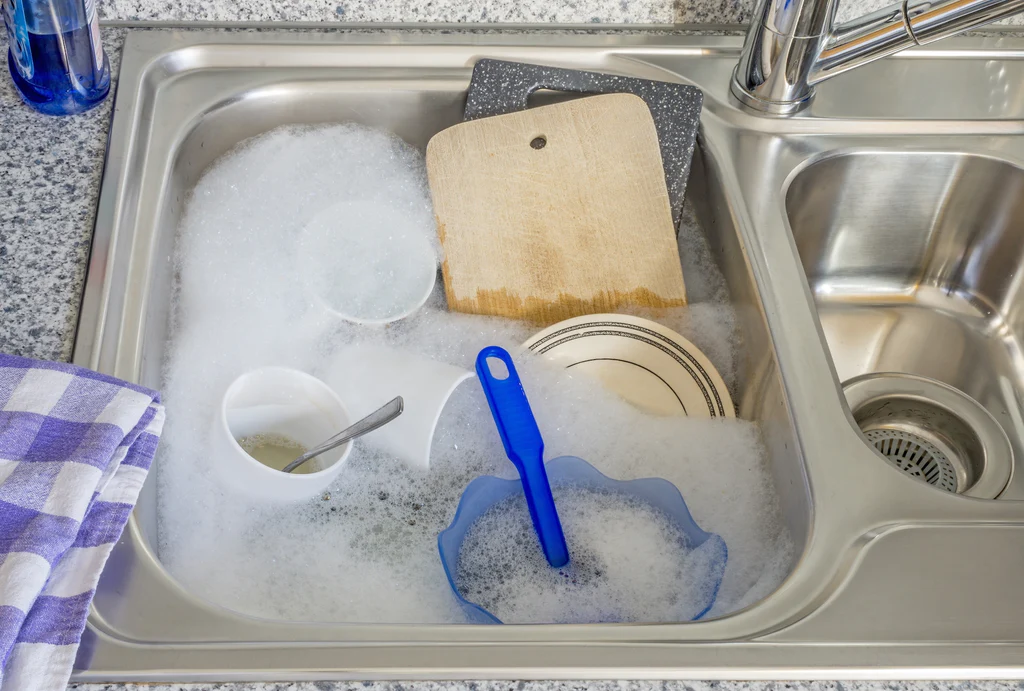
Fill half of a split sink with hot water (“as hot as your hands can stand”) and a small amount of plant-based dish soap; fill the other side of the sink with clean hot water. Scrub dishes on the soapy side, then rinse them on the clean side. Avoid letting the water run as you’re washing, if possible. Wash the glassware first. Then move to plates and silverware. Finish with pots and pans. Dry with dish towels, not paper towels (remember: the goal is green), or let air dry in a drying rack.

By using this hand-washing technique, you’re likely using the same amount of water as a typical Energy Star dishwasher does, around 4 gallons. The differences we’re talking about are pretty marginal.

You can also opt to hand wash dishes using foaming dish spray. Dish soap spray quickly dissolves stuck on and baked on messes. The spray-activated foam instantly cuts grease on contact (no water needed), working faster than regular dish soap. It’s convenient and easy to use – simply spray onto dishes, pots and pans, wipe and then rinse away.

Sanitation Standoff

The dishwasher does in fact clean the dishes “more”. Dishwashing is very effective in sanitizing dishes and other household items. It achieves optimal removal of soiling and bacterial matter through a combination of temperature, water distribution, and time — something that’s not possible with hand-washing. Basically, the water inside most of our machines gets hotter than the water from our tap, offering a better chance at killing germs.

The Environmental Arena

A dishwasher—especially a high-performing water-efficient, energy-efficient dishwasher—is going to be the way to go for most people. It’s really hard to beat the efficiency of a dishwasher. A modern dishwasher uses somewhere between a gallon and a half to five gallons per cycle. Washing dishes by hand (if you leave the faucet running) sends more than two gallons of water down the drain per minute.

Analysis out of UCLA also shows that dishwashers generate fewer greenhouse gas emissions. The additional water distribution and energy required to heat the water for hand-washing is just a little bit harder on the environment.

But don’t worry, you’re not going to single-handedly ruin the environment or anything by using the tap. Just follow the best practices we outlined above.

Habits Of People With Really Clean Houses

There are plenty of people out there who never panic at the thought of a visitor, and whose homes just seem to, dare we say it, stay clean without effort. We all know someone like this, whose house seems to exist in a permanent state of spotlessness, even when you happen to drop in on them unexpectedly.

So what’s their secret to keeping things clean?

Turns out, the key to keeping a consistently clean house is staying on top of chores a little bit at a time and developing habits that keep their homes clutter free without thinking twice. In the process, they exert less energy than those of us who resort to binge clean-ups. Rather than attempting to clean the entire house all at once, try tackling small tasks — like wiping down counters, starting a load of laundry or putting away stray items — when you have a few minutes to spare.

Here are 15 things people with tidy homes do regularly:

They Make the Bed

As soon as you roll out of bed in the morning, make an effort to make your bed, or at the very least, fold the comforter and toss the pillows back where they belong. Your room will always look presentable and clean, and it’s guaranteed to make you feel like you have your act together.

They Don’t Wear Shoes in The House

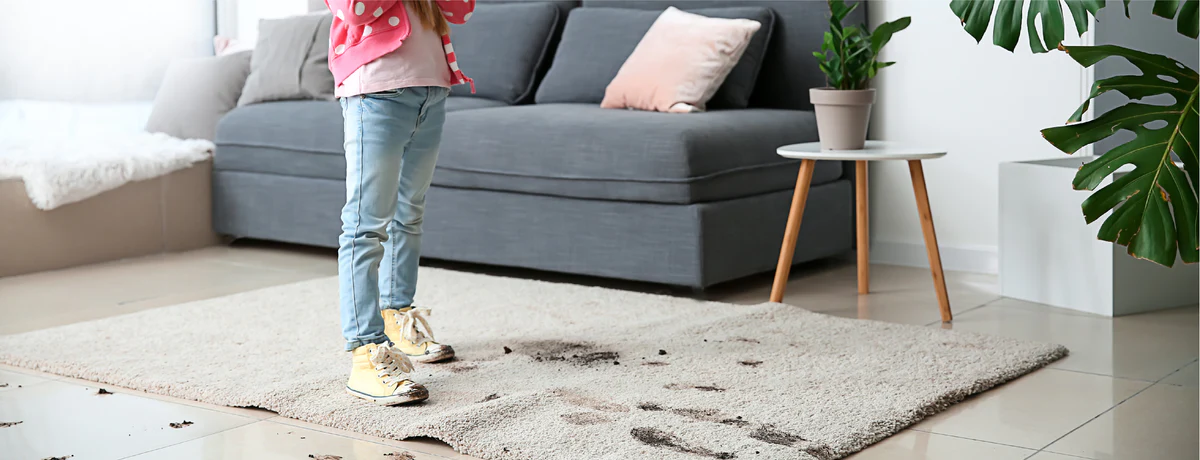
Even when your shoes seem clean, they are still covered in dirt and bacteria. This means that when you wear them in the house or rest them on the furniture *gasp*, you’re spreading those germs around your home. Removing your shoes when you enter your home (and requesting guests do the same) not only reduces the amount of actual dirt trekked into your home, but also limits your exposure to the “other stuff” you walk through.

They Open Mail Everyday

Make it a goal to spend 30 seconds with that stack of mail every day. Immediately recycle or shred anything you don’t need — and don’t feel bad about getting rid off any non-subscription catalogs that don’t warrant your time.

They Invest in Quality Products

People with well-kept homes also invest in quality cleaning products that make the job easier, and they don’t let clutter get out of control.

They Clean as They Cook

Forget what you’ve heard about leaving dishes to soak in the sink. By cleaning up while you cook — even if that means giving cutting boards and sauce pans a quick rinse — you’ll break down food particles more easily and minimize the mess.

They Run the Dishwasher Every. Single. Day.

Owning a high-efficiency appliance makes this routine economical. Make it a habit of loading the dishwasher and running it every night after dinner, and unloading it as your coffee brews the following morning. If you only produce enough to fill some of the dishwasher, keep in mind that many appliances have a half-load setting that targets the top rack and uses up to 30% less water.

They Put Appliances Away

We’re not saying that your coffee maker can’t sit on the counter. But, we are saying that your coffee maker doesn’t need to be accompanied by your blender, slow cooker, air fryer and toaster. Having all of these appliances next to each other will make your kitchen look cluttered and leave little room for meal-prep, so tuck them out of sight after you’re done using them.

They Keep Up with Laundry

Keep up with laundry by adopting a consistent routine, such as committing to running loads two nights a week, and put the clothing back on hangers and in drawers immediately.

They Wipe Down Surfaces

A quick wipe-down can do wonders. If you clean the surface you’ve used after each task before walking away, you’ll keep counters and glass surfaces clean and ready to go. From swiping your glass shower door to running a towel around your sink after washing the dishes, a short clean can prevent grime build-up and keep your surfaces spotless.

They Regularly Assess the Pantry

Instead of saving baking ingredients and canned goods long after they’ve expired, check their sell-by-dates on a regular basis. A weekly sweep of your pantry will not only remind you which items you still have in stock, but will also help you get rid of anything that could potentially make you ill.

They Put Things Away Immediately

They never leave a room empty-handed, have a place for everything and don’t allow clutter to build up. Remember growing up when your parents would stop you and tell you to take your dishes with you as you left? Turns out they were right…again. Getting into the habit of putting items away as you leave a room leads to an effortlessly clean house. No more jackets on the bed, shoes on the floor or keys on the counter. If you want a clean house, you have to get into the habit of always putting things away immediately. This is imperative. And if you have too much stuff without a place to go, the clutter and piles in your home become impossible to actually clean.

They Keep High-Touch Surfaces Germ-Free

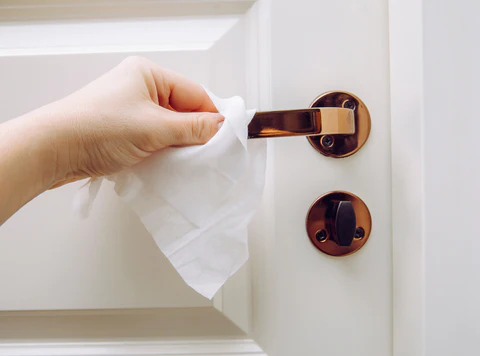
There’s no denying that wet wipes make disinfecting surfaces easy (and satisfying). Keep a container handy, and use wet wipes once a week (or daily during flu season) for attacks on light switches, remote controls, drawer pulls, banisters and doorknobs.

They Keep the Air Fresh

If you’ve ever walked into your friend’s home and been blown away by how clean and fresh it smells, odds are that didn’t just happen. Whether they diffuse essential oils, light a fragrant candle or simply open the window every once in a while to beckon fresh air indoors, keeping the air fresh isn’t just an afterthought.

They Straighten Up Before Bedtime

Do a quick sweep through your most lived-in rooms before you call it a night. Tuck away any toys, shoes, or blankets, and make sure backpacks and bags are ready for the next day. You’ll thank yourself in the morning.

They Make Chores a Part of their Lifestyle

Folding clothes while watching TV, doing a quick sweep while dinner is cooking or simply organizing the fridge when you reach for your next snack are all good habits to get into to help keep your house constantly clean. And clean throughout the year. Seasonality doesn’t need to dictate when we decide to clean our homes, so forget you ever heard of “spring cleaning.” Instead, make purging a routine (monthly, or quarterly) to keep the excess to a minimum, and keep minimalism at the forefront. Keep donate, hand-me-down, and recycling bins in well-marked and convenient spots to help make it easier to master an ongoing method that works for you.

Fragrance-Free Vs. Scented Home Care Products

For a lot of consumers, scented cleaning products are an integral part of making their cleaning experience more pleasant.

It’s difficult enough to understand the paragraph of ingredients listed on most cleaning products, let alone the complicated terms that brands use to describe fragrances.

What are fragrances exactly and do they change the effectiveness of the cleaning product itself? What does unscented and fragrance-free really mean? And, perhaps most importantly, how can we choose the products that work well—and still smell good? Below, we’re breaking down every little thing you need to know about fragrances in your cleaning products.

Scented

First, what is fragrance?

A fragrance, or a perfume, is a chemical concoction that smells really good (or really bad, depending on your preference). You can find fragrances in many different types of products on the market.

Why use fragrance?

It’s because most people like when their home and laundry care products smell nice. Companies understand the power of a pleasingly fragranced product, and how that impacts a consumer’s buying decisions and their experience of using the product at home.

In general, fragrance is added to products to make them more appealing.

For many people, enjoying fragrances is one of life’s luxuries. For those of you struggling with sensitive skin, though, even the most natural perfumes are a luxury you can’t afford. There are three categories of fragrances—synthetic fragrances, natural fragrances, and essential oils. All of these fragrances can cause a problem if you have sensitive skin or are sensitive to fragrance.

What does “natural” actually mean when it comes to fragrances?

Natural fragrances, as defined by the International Fragrance Association (IFRA) must be plant derived from aromatic natural raw materials. Natural fragrance molecules are single molecular entities derived from a natural source. They must be physically obtained from plants through mechanical extraction (through cold pressing for example) or distillation (via water or steam.) They cannot be chemically altered or made from artificial materials. Companies extract natural fragrances from flowers, spices, and more. For example geraniol, extracted from roses would be a natural fragrance. Natural fragrances are beautiful; however the scent doesn’t last as long and the scent extracted can vary according to environmental changes and harvest variation.

Essential oils are mixtures that are isolated from plant sources. Thus, they are natural fragrances.
Synthetic (aka artificial) fragrances contain chemicals that are not derived from a natural source—they are made in a lab. They’re synthesized using inorganic substances and designed to mimic natural scents. So geraniol synthesized in the lab would be a synthetic fragrance even though it is exactly the same substance. Of course you can also have fragrances that are synthetic and not found in nature at all. There are thousands of fragrance chemicals which are used in different combinations to create these different notes.

However just because natural fragrances are from nature does not mean they will be beneficial the same way that synthetic fragrances in a lab aren’t always going to cause harm.

Why so much anxiety about fragrance?

There are multiple reasons, one of which is the effect these compounds have on sensitive skin. The other reason is that manufacturers aren’t required by law to list the ingredients they use in fragrance. The list of chemicals that are allowed under the “fragrance” label is constantly growing; as of late 2021, the list was nearly 4,000 ingredients long. Some of those chemicals are completely harmless (for example, “Lavender” is on that list), while others pose established threats to human and environmental health (we’ll get to that in a minute).

The word “fragrance” has been protected in the industry for many years as a “trade secret,” meaning that companies do not have to disclose all of the raw materials that make up a fragrance. They can instead list just “fragrance” or “parfum” as a catchall term. That means you could be introducing a host of toxic chemicals to your home without ever even knowing it. When you think of fragrance, terms such as phthalates and parabens may come to mind. Particularly concerning is the high concentration of phthalates, which we’ll talk about more in a bit. Some synthetic fragrances can include nasty chemicals like benzene derivatives (carcinogenic) or toluene.

We are exposed to fragrance chemicals primarily through the inhalation of volatile organic compounds (VOCs) that readily evaporate from the scented product into the air or direct skin contact.

Side effects

Synthetic fragrances are more potent and can contain added fixatives – often endocrine disrupting phthalates, to make the scent last longer. Artificial fragrances are the #1 irritant on skin and one of the most potentially harmful ingredients we can encounter – because they contain phthalates. While evidence isn’t conclusive that phthalates are bad for people, there are links between phthalates and increasing rates of chronic disease. Phthalates have been linked from everything to testicular cancer to liver cancer, but allergies and asthma still remain the biggest side effect of artificial fragrance and studies reveal that women are even more susceptible to these side effects.
For more information about phthalates, check out these sources:

https://www.cdc.gov/biomonitoring/Phthalates_FactSheet.html

https://www.webmd.com/a-to-z-guides/features/what-are-phthalates#1

Not all synthetic fragrances are harmful.

Synthetic fragrances are not necessarily bad, but there has been some bad publicity in recent years given to parabens and phthalates, which can be found in synthetic fragrances. While phthalates can be found in non-natural fragrances, synthetics can indeed be made without such toxins. So are synthetic fragrances without phthalates safe? Though phthalate-free, synthetic fragrances aren’t from nature, they’re considered safe for your skin and body.

Here at Boulder Clean, we stand by safer scents — it’s simply what we’re made of. People + pets + the planet are always top of mind. Even so, we wanted to clear up any confusion about synthetic fragrances. They often get a bad rap, when in reality, you can have a safe household cleaner that contains them. We’re here to debunk the bogus myth that synthetic fragrances are unsafe, because it’s just not true. Let us explain…

The B-Clean Promise

Here’s what we promise to you: by using a combo of both safer synthetic + natural ingredients, you can rest assured that you won’t find any of the unnecessary fillers + nasty chemicals that dilute or pollute a scent. We never use any of this nasty junk because it’s simply not necessary when making a healthier synthetic fragrance, so we leave all that other stuff out to ensure a safer synthetic formula.

Be it synthetic or natural, we only choose the safest scents Every. Single. Time. That means we never use parabens, phthalates, PBTs, synthetic carcinogens, mutagens, etc. We follow the strictest safety guidelines from the IFRA. But that’s just our starting point. We also follow the EPA Safer Choice interim fragrance criteria, and then we slap on our own tough regulations on top of all that. Humble boast, but we’re sticklers when it comes to safety.

Why we use a combo of synthetic + natural fragrances

One big difference between our cleaners and many other natural cleaners is how they smell. While we make some of our products with all-natural oils, we also add phthalate-free fragrances to ensure an amazing scent. These synthetic fragrances may also be blended with essential oils for a more natural scent.

We call our scents “nature-inspired” because we use nature as the roadmap, but not the end-all-be-all source. Sure, we use our fair share of natural ingredients. But as we mentioned above, sometimes a fragrance in its natural state can still harbor some pretty nasty (natural) toxins in there. When it comes to natural fragrances, there can be safety hazards, respiratory sensitizers, allergens + carcinogens in those too. That’s why we only choose from the safest natural + synthetic ingredients. By making fragrances the right way, we make can sure none of those nasty chemicals, from naturally-occurring ingredients or from synthetic sources, ever make it into your air.

What we’re trying to say here is that it’s important to remember that the word “natural” does not mean safe.

Can synthetic fragrances be the safer choice?

Sometimes it’s actually safer to use a synthetic fragrance then a natural one (mic drop). This is because sometimes a natural fragrance can have harmful, toxic properties in its all-natural state. But when making a fragrance ingredient that smells natural, those natural toxins can be removed from the equation, making it safer to breathe but still smelling, well, like nature intended!

Essential oils can also be sourced in an unsustainable way, so it’s important that companies are conscious about how they obtain their natural scents from an environmental standpoint as well.

It’s also important to point out that unnatural (synthetic) fragrances don’t cause more allergic reactions than natural. Any fragrance can contain allergens, unless they are removed, because allergens come in all shapes + sizes (synthetically + naturally occurring).

Unscented + Fragrance-free

The difference between fragrance-free and unscented

Fragrance-free means that no fragrance materials—synthetic or natural—are used in the product. Instead, these products smell like the ingredients they contain. Fragrance-free products make them perfect for people with sensitive skin (or noses). These products also reduce the risk of reaction to known chemical sensitizers that your skin could come into contact with.

However, just because a product is fragrance free does not mean it doesn’t have a scent. Simply put a fragrance-free product cannot have added fragrance. However, it can contain ingredients that have a scent of their own. For example, our liquid laundry detergent is made with a cold-pressed orange oil that has a smell. So it could still be labelled as fragrance-free because the purpose of the oil is to act as a degreaser, not as a scent. But it could not be labelled unscented.

On the other hand, unscented generally means that the product doesn’t have an obvious fragrance. However, this statement can be misleading. While unscented products have no smell, they do use chemicals or other substances to neutralize or mask the odor of the product’s active ingredients (which don’t always smell great). For example, if a product is formulated with lavender, for example, but some chemical is added to mask the smell, the product can be labelled as “unscented” but not fragrance free. These may contain synthetic fragrances and phthalates.

What to look for

It is very important when buying any products, especially if you have sensitive skin or allergies, that you check the ingredients of products. If you aren’t sure, check out the label or visit the product’s branded website. Look at the ingredients listed on products and avoid products that include phthalate, DEP, DBP, DEHP, DiDP, DnOP and DINP. If “fragrance” is listed as an ingredient and it isn’t specified as a phthalate-free fragrance, it’s best to avoid those products as well. Regulations do not require the listing of individual fragrance ingredients, so it’s not known if phthalates are present unless specifically listed. Alternatively, choose third-party certified, green cleaning products to lower harmful chemical exposures: U.S. Environmental Protection Agency’s “Safer Choice” fragrance-free labelGreen Seal or ECOLOGO. Products with these certifications, ensure that fragrances used are phthalate-free.

If you like using products with fragrances, your best bet is turning to ones containing natural fragrances—like essential oils—provided that you’re not allergic to the stuff. Anyone can be allergic to anything, so some individuals can have allergic reactions to certain essential oils. For example, those who are allergic to ragweed should avoid using chamomile. Keep in mind, the Food and Drug Administration (FDA) does not regulate the essential oil industry, which makes careful sourcing on the part of brands and consumers very important.

Ways To Prevent Mud, Dirt, Snow, And Grass From Trekking Into Your House

All seasons are beautiful in their own way, from leaves dropping during the fall to mounds of snow during the winter. However, you don’t want to track all that outside debris inside your home. Strategies like enacting a shoes-off policy, adding easy-to-clean rugs and doormats, and investing in hands-free boot removers can prevent germs and dirt from creeping inside your home. Here are five smart ways home experts prevent mud, dirt, snow, and grass from trekking indoors.

Designate just one or two entrances for muddy feet and paws.

The first step in keeping mud out of your house during wet weather is to limit the number of places where it can be tracked inside. It is best to choose an entrance that leads into a room that doesn’t have carpet or any furniture that a dog or child might jump on before you can get them out of their dirty shoes or wipe the mud off of their feet.

A garage, laundry room, mud room or kitchen usually works best and is far more likely to have a floor that is easy to clean.

DIY Mudroom

If you are at all concerned about mud being tracked into your home during rainy weather, you definitely need a mud room — or at least a mud area. If you already have a mud room in your home, you are way ahead of the game. The whole purpose of this room is to provide a space between the oh-so-dirty outside world and the indoor living spaces in your home. This single area will likely do more to keep dirt and mud out of your home than any other mud-reducing solution.

If you do not currently have a mudroom, it is time to make one.

Any spot without carpet at an exterior entrance will do, but it is usually most convenient if it is located in a garage or laundry room that has a handy door to your backyard or side yard.

If you enter your home through the front door, a hall tree works wonders for controlling mess and clutter. It has cubbies with bins and baskets for scarves, hooks for hanging bags, easy-access shoe shelves and hidden storage behind its shuttered doors.

If you enter your home through the garage, it’s easy to create a makeshift mudroom. Lay down large area rugs to keep the dirt out of your house and install sufficient shelving so bags can be stored out of the way, yet in an accessible spot. Locker-style storage offers individualized spaces for DIY supplies, sports equipment, and outerwear.

It is also quite convenient to locate the mudroom near your laundry room or the laundry area in your garage so that everyone can drop off their wet or dirty clothing without carrying it through the house.

A covered front porch is also a great spot for an open-air mud room where people can remove wet or muddy shoes and clothing before entering the house. When it is raining, it is much harder to convince someone to stand in the downpour while they take off their shoes, but if they have protection from the elements while they are still outside, they will have no excuse for not taking the time to remove muddy shoes and clothes before coming inside.

Adopt a shoes-off policy.

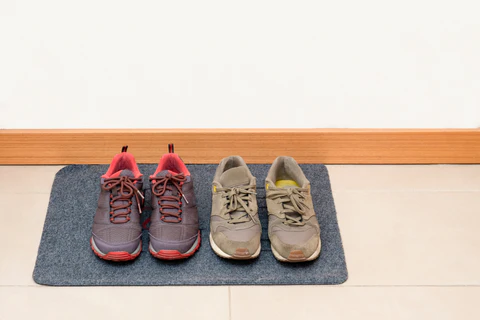
It is a good idea to make your house a no-shoe zone regardless of the weather. This helps to keep mud outside when it’s raining, but even when the sun is out, this helps keep dirt, pesticides and other unsavory elements from being tracked into your home.

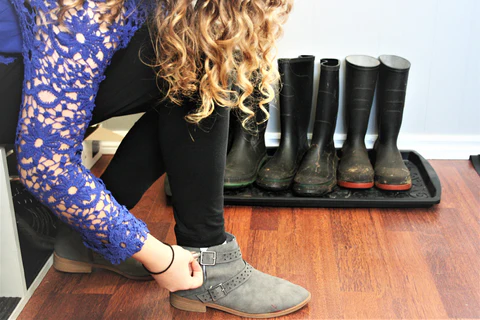
A boot tray is a simple, inexpensive solution for muddy boots and shoes and can be placed on a porch or in your mud room by the door. And with a boot remover you can stop struggling with taking your muddy boots and shoes off—you don’t need to touch your boots to take them off, so you can keep your hands clean. If you want to go a step farther, you can keep a basket of slippers just inside the door for use by your family members and guests once they have taken their shoes off outside.

It is also a good idea to have shoes that you keep by the door that are only used for working in the yard or garden or that are only used for playing outside. Designating shoes strictly for gardening or outside play is a great way to ensure that they are not worn inside and to keep mud out of the house.

Add rugs and runners at your entryways.

If your goal is to keep mud out of the house, every entrance needs a mat on the outside and a rug on the inside. The mat-and-rug system is the ideal solution for catching some of the mess before it makes it into the house.

Of course, not just any mat will do; it needs to be a bristly or rubber mat that will trap or scrape off mud as your pets, family members and guests walk on it. Look for options with a high-low surface rib design. This will help to trap dirt and moisture in the recessed channels below shoe-level to keep grime outside. A large mat that is difficult to avoid is best, but you can also use multiple mats if you are not able to find one large enough to suit this purpose. There are even specially designed doormats made specifically to soak up water and mud from pups who have been out to play after the snow or rain.

Just inside each of your doors, you should have a washable rug. Something more like a runner leading up to your door is generally most effective. While it might be tempting to purchase nicer rugs that are more attractive, it is most likely not worth the expense. These rugs are going to be doing a lot of work and spending a lot of time being tumbled around in your washer and dryer, so the smarter choice is to go for something sturdy and functional that you will not mind ruining. An easy-to-clean option is to use an indoor-outdoor rug. Old throw rugs that have seen better days also work well for this, as do old bathroom rugs.

Keep towels by the door.

Keep a basket of clean towels in your mud room or by your designated entrance. This will ensure that a towel is always handy when you need to dry off a wet child or wipe muddy paws.

Pay attention to your flooring.

The flooring in your mudroom or entryway should withstand water, dirt, and excess debris and be easy to clean. Durability and visual appeal are important factors to consider when choosing the best flooring type for your entryway. There are a variety of tile and vinyl options that will complement your existing interior themes while offering the strength and moisture-resistance you need. Tile and high-quality vinyl are waterproof and will provide protection.

Install good ground covers.

Ground cover is a particularly important part of your overall landscape design if you are trying to keep mud out of your home. After all, there would be no mud to track in if proper ground covers are in place to ensure that there is no mud.

Most of the mud that is tracked from your yard into your house is either going to originate in bare patches of dirt or in a natural grass lawn. It is particularly important that you limit mud in areas where your children or pets play, in your pets’ favorite bathroom spots and in any areas that are near entrances to your home.

Natural grass can be a nightmare during and after rain, and if you have children, pets or guests who walk through the grass and into your home, you may end up with both mud and wet blades of grass tracked all over your floors. An easy solution to this problem is to consider is gravel, which is a practical choice that allows for proper drainage without puddles or muddy patches.

Your Turn…

What tricks do you employ to prevent outside dirt and mud from getting traipsed through the house?

How To Clean Your Fireplace

Often the focal point of a room, a crackling fire adds warmth, ambiance, and style to a home.

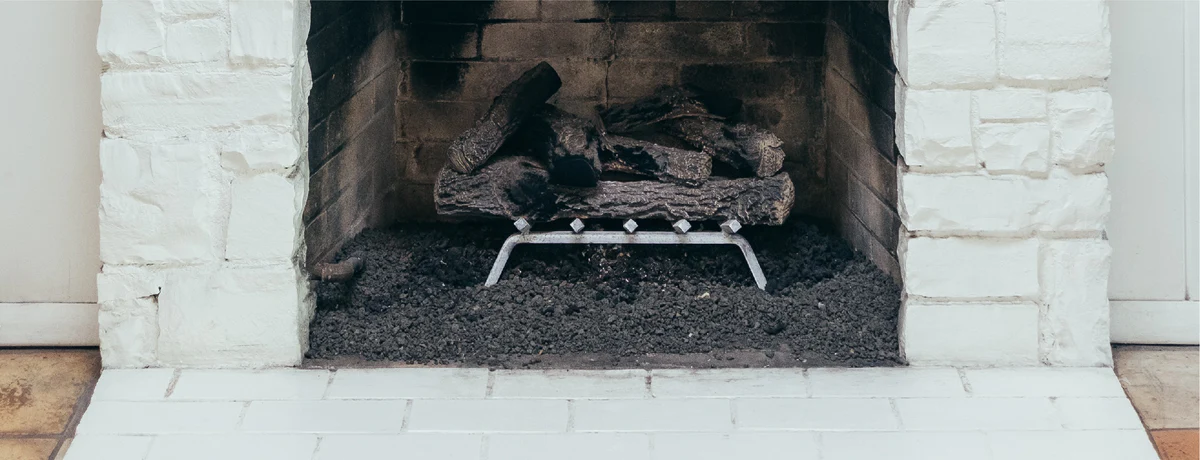
Fireplaces require regular cleaning both for appearances and safety. With every fire, ash, soot, creosote, and other debris collect inside your fireplace, and over time, this buildup can pose a dangerous fire hazard. Neglecting regular fireplace cleaning can also result in dark stains around the hearth and mantel or cause fine ash and dust to spread throughout your home’s air.

By learning how to clean a fireplace the right way, you can reduce dust and particulates in the air, lessen smoky odors, and reduce the chance of accidental fire damage. To thoroughly clean your fireplace, follow the steps below. When you’re done, you’ll be ready to snuggle up around the fire.

Wood-Burning Fireplaces

Wait 24 hours after your last fire before cleaning a fireplace to ensure it’s completely cool. This task will likely get messy, so plan to wear old clothing, and take precautions to avoid inhaling soot and ash. Wear safety goggles, gloves, and a dust mask or respirator.

Step 1: Remove Ash and Debris

Discard any remaining chunks of burnt wood. Remove the andirons and grate and set aside. Using a fireplace shovel scoop out ash and debris into a small, metal—never plastic—bucket. Dispose of them in a metal trash can or add the ashes to your garden soil to enrich it. Alternatively, use a handheld broom to sweep ash from the walls and floor of the fireplace into a dustpan and discard.

Remove the remaining dust on the walls and floor with a shop vacuum or the hose attachment of your regular vacuum. This is also a good time to vacuum and dust the hearth, fireplace surround, and mantel.

Step 2: Deep-Clean the Firebox and Surround

  1. Fill a spray bottle with cool water and two buckets with one gallon of warm water each. To the first bucket, add two tablespoons of grease-cutting dishwashing liquid. To the second bucket, add one cup of distilled white vinegar.
  2. Spray a small area of the firebox with water. Dip a stiff-bristled scrub brush in the soapy solution and sprinkle it with regular table salt. The abrasive salt will help loosen the soot.
  3. Scrub the dampened area and use a sponge to wipe away the soot. Dip a second sponge in the vinegar solution and rinse the cleaned area. The vinegar helps cut through any remaining residue and reduces smoky odors.
  4. Continue scrubbing, rinsing out the brush and sponges often, until the firebox is clean. If the fireplace is large, you may need to mix a second batch of fresh cleaning solutions.

Step 3: Clean the Fireplace Doors

Fireplace glass can get pretty filthy over the winter months. Naturally, you don’t want that layer of grime hanging out all year long. Leftover ash can serve as a mild, natural abrasive for cleaning fireplace doors. Dip a damp paper towel into your bucket of ash and scrub the doors until clean. You’re going to need to put some muscle behind this to see results. Once all the grime is gone, wipe off any streaks with a dry microfiber cloth.

Step 4: Clean the Andirons and Grates

Wash the andirons, grates, and other fireplace tools with dish soap and water. To avoid making a mess indoors, consider cleaning fireplace accessories outside. Use a stiff-bristled brush to scrub any stubborn stains. Rinse and let dry before replacing the andirons and grates inside the fireplace.

When to Call a Professional

If you prefer to leave the messy job of inspecting and cleaning your fireplace or stove to someone else, expect to pay $100-$200 for a professional inspection and cleaning. Although the chimney sweep industry is not regulated or licensed by a government agency, many sweeps apply for certification by the Chimney Safety Institute of America (CSIA) or membership in the National Chimney Sweep Guild (NCSG). These organizations promote professionalism in the industry by testing applicants and providing continuing education opportunities to keep members up-to-date on current technology and fire safety.

  1. Removing Creosote Buildup: Having your chimney professionally cleaned is often the best way to remove creosote. When wood burns, it produces water vapor, gases, and smoke. Ideally, all these are swept up the flue and out the chimney. However, as these warm vapors reach the upper parts of the chimney, they encounter the cooler outdoor air and condense, forming creosote. This black or brown residue clings to the inner surfaces of the flue liner and can be hard and glassy, sticky, or even dry and flaky.
  2. Cleaning the Chimney and Flue: If you can’t see the entire flue from below, you’ll have to check from the roof. If you’re at all uncomfortable doing this or have no experience working on a roof, hire a professional chimney sweep to inspect and clean the chimney and the flue.

Gas Fireplaces

While frequently used wood-burning fireplaces require more maintenance, even gas-powered fireplaces should be cleaned regularly. Turn off the gas at the main valve and vacuum away dust and cobwebs from the firebox. Inspect the unit for any cracks or scorched areas and call a certified gas technician if you see problems.

Electric Fireplaces

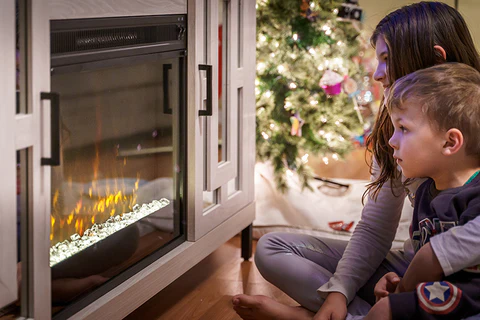
Electric fireplaces are cleaner than gas or wood fireplaces since they warm the air with a heater. However, they require cleaning, just like any other aspect of the house. By now, we know an essential step is to turn off the unit. Open or remove glass doors. With a clean cloth, dust your hearth, andirons, logs, and stones. To make your metal andirons even shinier, use metal polish. Use a hand vacuum or hose attachment to clean vents.

The interior and exterior of your fireplace walls should be cleaned with a duster or a damp, clean cloth. Your fireplace’s glass doors should be cleaned. Use a clean cloth or paper towels along with a plant based glass cleaner.

—–

Knowing how to clean a fireplace can make the idea of lighting that cozy fire a bit more enticing. So until the weather warms up, keep your hearth soot free and enjoy the crackling sounds of the fire that makes your home that much cozier.

Decorating & Cleaning Tips For The Holidays

Get Your Home Clean & Clutter Free For Christmas

Our homes are the “hub” of the holiday season. It’s where we gather to eat, play, and celebrate together. But let’s be honest, preparing our homes for the holidays can sometimes be overwhelming. The key to successful holiday cleaning is to start early: Plan to kick off your housekeeping tasks several days in advance. We’ve gathered our top ways to get your home sparkling clean this Christmas, leaving you time to actually enjoy the festivities.

#1: Start by playing holiday music. It’s an easy way to set the holiday mood and distract you from “chore aspect” of the tasks at hand.

#2: One big tip you can use to make sure your house is as clean as possible during the holidays is to deep clean while you decorate it. Since holiday decorating often requires you to shift around furniture and tabletop items (especially to make room for the tree), it’s a great idea to clean your house as your are putting out all your decorations. Begin by removing and storing your day-to-day décor that will be replaced with holiday decorations. Then dust and clean surfaces.

For example: We love a great wreath on a mirror. But before you hang a new wreath, use some of our favorite glass cleaner and lint-free wipes to just give everything a once over.

#3: And speaking about decorations… you don’t have to go overboard with decorations to make an amazing impact at this time of year. Think about the rooms that you will be socializing in, and focus on these first. Then look at having 1-2 key items in the room that will make a real statement instead of lots of little things that will just end up cluttering the space. Spend a day decorating and make it a tradition.

Choose a scented candle with a Christmassy aroma for instant festive cheer. Pine, cinnamon, gingerbread and cloves are a few of Santa’s favorite. Or make your own stovetop potpourri. Add water, cranberries, orange slices, cinnamon sticks and vanilla to a pot (along with any additional spices you like), bring to a boil, then reduce to a simmer. The warm smell of the holidays will fill the house in no time.

Create the best top table
: When setting the table for Christmas day, think about introducing some natural elements. Holly, berries, evergreen sprigs and pinecones all look beautiful and are easy and cheap to source. Set your dinner table the night before Christmas Day so you can fully enjoy it.

#4: Create a wrapping station. Having a designated space to store gift-wrapping materials not only makes the wrapping process easier, but also helps to prevent unnecessary spending on gift wrap, tape, and gift tags since you are able to easily assess what you have on hand. A desk in the home office or a dresser in the basement works wonderfully for a wrapping station. But a plastic or zippered cloth container that slides under the bed is also an option: simply put all wrapping supplies in the box and bring it out when it’s time to wrap.

#5: If guests are staying overnight, get the guest bedroom ready first so you don’t have to worry about it later. Dust surfaces and baseboards, vacuum, wash linens and make the bed and put out any extras to make their stay more comfortable, such as towels and wash cloths, and any welcoming gifts.

#6: Declutter. If you have kids, dedicate some time to clear out old toys and make room for the new ones. You can sell them on Ebay, Marketplace or donate to a charity shop of your choice. If you have a feeling that you will be getting a new clothes from Santa this Christmas, make sure you have enough space in your wardrobe. It’s great to have a clear out and donate old or never worn clothes and shoes to charity.

#7: Do a pantry audit. Throw out any expired spices, canned goods, and boxed foods. Apply the same rule you would to clothes in your closet: If you haven’t touched it in six months, toss it or donate it to a food bank. When you’re done, you’ll also have a good list of what you need to restock.

#8: Clean high-traffic areas. Vacuum, dust and wipe down surfaces.

#9: Since people like to congregate in the kitchen during Christmas, make sure your kitchen is ready. Take the time to wash down the walls and cabinets and clean appliances, including inside the refrigerator and oven. Make sure your dishwasher is working properly so it’s ready for all those dirty dishes. Sanitize countertops.

#10: Your main bathroom will be used more this season, so ensure that you scrub the floor, wipe down the toilet, and shower. Remove any gunk on the counter and sink. Disinfecting will help as there will be no need for re-scrubbing. Make sure that you have plenty of toilet paper.

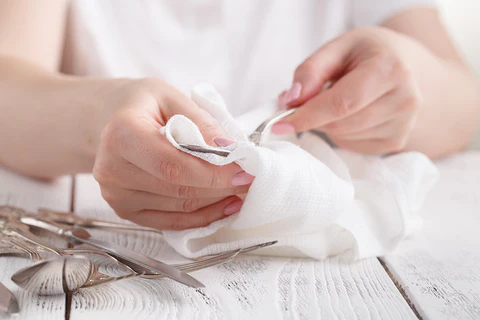
#11: We’ve all got that nice set of cutlery or dining set that only makes an appearance on special occasions. Now is their time to shine – literally. Set the time aside to clean and polish your lovely kitchenware and make your Christmas meal even more memorable. Wash any special bowls or platters you may want to use throughout the season.

#12: Flip cushions. Lift the cushions of the sofa to vacuum up dust bunnies and crumbs that tend to congregate there, then flip them.

#13: Add mats. Winterize the area around your entryway to keep mud and snow from getting tracked inside all season long. Put a rough coir or rubber mat just outside the door for wiping off boots and an extra-absorbent mat (look for propylene versions) inside to rein in extra moisture.

#14: You’ll be doing a lot of laundry over the holidays so now is the time to get the laundry room prepped and ready for battle. Make sure you’re stocked up on supplies.

#15: Speaking about laundry, leave time to think about what you are going to wear on the big day. Your home shouldn’t be the only one dazzling your guests this Christmas. Plan your outfits for the festive period and make sure that they are spick and span and ready to show you off.

#16: Maintain It. Once you’ve got the house clean and tidy, try to avoid using any rooms you’ve cleaned unless you have to. Then all you have to do is a quick tidy-up (refresh countertops and floors) the day before your guests arrive.

The Ultimate Thanksgiving Cleaning Checklist

The holidays can be a hectic time with visits from family and friends, shopping and cooking special meals. On any holiday, we always think about the cleanliness of the home, we want everything to be clean, tidy, and impeccable. But cleaning doesn’t have to add to your stress. And this is not impossible, but we need to dedicate a little time and effort as preparing for Thanksgiving is by no means a one-day affair.

Since we are on the eve of this long-awaited holiday, we are going to give you some necessary tips on everything from preparing for the holiday and hosting guests so that everything is ready to enjoy, to cleaning up afterward.

Before Your Thanksgiving Guests Arrive

Let’s face it. Not all of us were born to be Mary Poppins, having everything in shipshape order all the time. And that’s okay. Really it is!

Much of having a smooth holiday rests on the preparation that’s done before the big day arrives. One of the best things you can do to promote a more stress-free Thanksgiving holiday is to prep as much as possible beforehand.

Some of the actual tasks will depend on whether or not you’re hosting just for the big day itself or plan to have guests stay in your home overnight. But, overall, each scenario shares much of the same chores. Here’s what to do:

1 Week to a Few Days Before

  • Remember, food is usually served in plenty during Thanksgiving, and thus you will need enough space in your refrigerator. Clean out and organize the refrigerator. This gives you an opening to toss out old leftovers and expired foods. It also gives you a chance to reorganize items to make more room so the leftovers fit in without a lot of fuss.

  • If you only have the time to clean one room in your house other than the kitchen, make sure you clean and disinfect the bathroom that the guests will use. Cleaning it will give a fresh and hygienic touch to this area. Be sure to stock it with enough toilet paper towels, and hand soap to accommodate your guests.
  • If you do plan to have overnight guests, make it a priority to tackle guest rooms first. Do a general cleaning in guest rooms, but also wash and freshen up the bed linens and towels so your guests feel cozy. Don’t forget to dust the furniture and vacuum the guest rooms as well as do a thorough cleaning of the guest bathroom. Make sure your family knows these areas are off-limits until your guests arrive so the rooms will stay clean until then.
  • Wash and clean all holiday decor and items, including tablecloths, placemats, cloth napkins, holiday dishes and silverware. If you’ve had serving dishes and platters stored and unused since the last holiday, you may want to pull those out as well and clean them.
  • Remove dust, dirt and clutter in the common, living, and dining areas.
  • Arrange and check that there are enough chairs for guests.

  • Remove leaves and accumulated dirt outside your home. Blow leaves off the driveway and sidewalk and offer a clearer path for your guests. Sweep the porch. If your yard gets dirty fast because of the fall wind, you may want to save this step for the day before your guests arrive.
  • Put mats and throw rugs at all entryways. This will help prevent dirt from being tracked into your home. You may also want a boot tray and a basket for hats and gloves if it’s cold.
  • Don’t forget the closet, free up a little space to store the coats and bags of your guests.
  • If the time has been short and you have not had the opportunity to do a general thanksgiving cleaning to your entire home, close doors of the rooms that you still have to order.
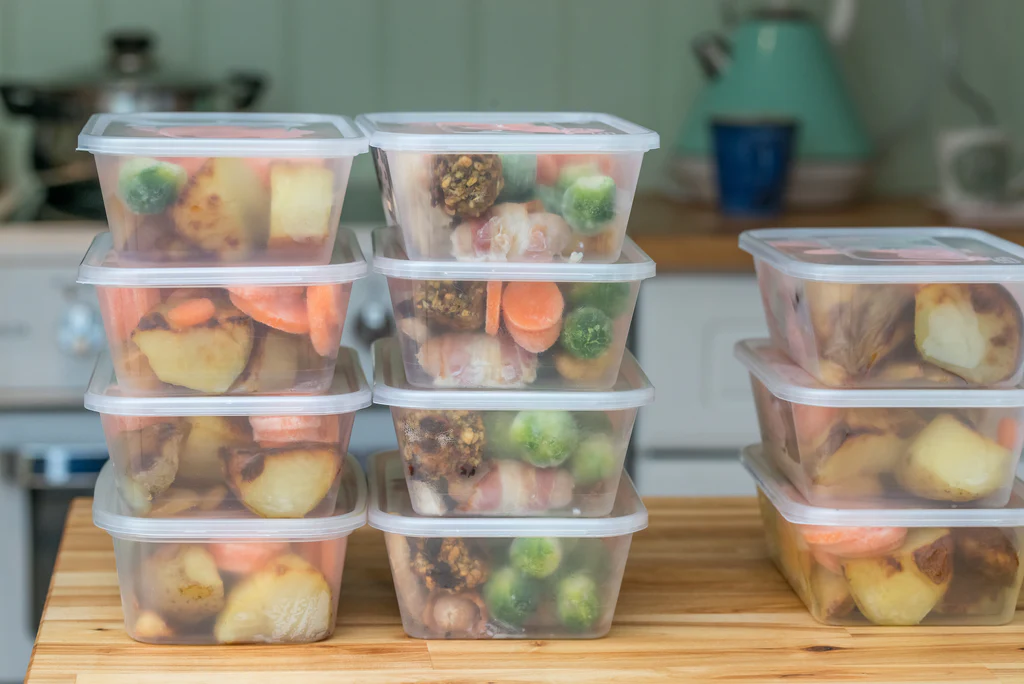
  • Prepare any Thanksgiving menu items ahead of time that you can. For instance, pies can be prepared ahead of time. Chop up any vegetables that are needed for your menu and store them in airtight containers until you’re ready to cook on Thanksgiving Day. Anything you can do to take the pressure off of you on the big day will help you feel more relaxed so you can enjoy your guests.
  • Purchase containers ahead of time so you can send guests home with leftovers. We love these and these sustainable options or or mason jars.

One Day Before…

  • Quickly run the vacuum in the rooms where your guests will most likely be such as the entryway, bathroom, dining room and living room.

  • Set your Thanksgiving table. This way you’ll not only have the job done, but will have a pretty display for guests when they arrive. Don’t forget to add a pretty centerpiece to the table. This can range from fresh fall flowers from the supermarket to a basket of miniature pumpkins and gourds.
  • Stock your kitchen with extra dish towels to handle all of the extra spills and cleaning.
  • Clean the kitchen counters/island. If you’re using that area to cook, that’s fine, but otherwise, daily clutter should be cleared away for the big day.
  • Be trash-ready. By double-bagging your garbage can, you’ll have a fresh bag ready as soon as you fill up and take out the first one.

On The Day Of…

Clean As You Go

Try to stay on top of the mess by wiping counters and washing and clearing pots and pans as you cook. Fill one side of your sink with hot soapy water and toss used tools to soak there until you’re done cooking. Cleaning kitchen countertops during meal preparation not only means less mess later, it can also prevent cross-contamination. The last thing you want is to send a dinner guest home with food poisoning. Before your guests arrive, run and empty the dishwasher, even if it isn’t quite full. This way, you can whisk many of the dinner dishes out of sight when the meal is over.

When the cooking’s all done and you’re ready to carve the turkey, jump-start the post meal cleanup. As soon as you transfer the turkey to the serving platter, fill your roasting pan with soapy water and let it soak in a 250 degree Fahrenheit (121 degrees Celsius) oven. The baked-on food softens up while you enjoy your guests’ company and the meal

After Your Meal…

You’re full of turkey and cranberry sauce and maybe eggnog or something a little stronger. The last thing on your mind is cleaning! But if you head upstairs and fall asleep, you’re going to have a huge mess on your hands in the morning.

Here are our tips for a quick thanksgiving clean-up the night of to help mitigate the amount of work you’ll have to do the next day.

Pack Away Leftovers

Make sure you have lots of Tupperware handy before your meal. This way, you can give out leftover food for everyone to take home or pack it all away neatly for yourself. Having a game plan for leftovers before dinner will help you clean up quickly.

Soak Pots And Pans

Inevitably, there will be some cooking items that you weren’t able to “clean as you went.” Soak difficult-to-clean pots, pans, and any empty serving dishes that are aren’t being used to store leftovers.

Run The Dishwasher

While heavily soiled dishes are soaking, tackle the rest of the pile. Scrape dishes of any uneaten food bits and simply load into the dishwasher. If you let your dishes sit overnight, food will cake onto them, making them much harder to clean. Plus, you’ll probably have to do more than one round of dishes, so get this started as soon as possible.

Toss The Trash

Grab a trash bag and get moving. There are probably a lot of paper napkins and plates, aluminum foil and plastic wrap, and more that you can quickly get rid of. Once you do this, your whole kitchen and dining room will feel a lot cleaner. And don’t forget to recycle!

Start The Laundry 

Whether you used paper or cloth napkins, you probably have some laundry from your Thanksgiving dinner. We’re thinking tea towels, aprons, and maybe those pants that you spilled gravy on. Whatever it is, sort your laundry, spray stains and start a load that you can chuck in the dryer when it’s finished.

Wipe The Countertops And Around The Stove

Wiping down the stove and the wall and counter around the stove will get rid of any food spray and backsplash before it has the chance to dry and stain. Take advantage of disinfecting at the same time.

Do A Quick Sweep

We promise, even though you won’t want to sweep after your guests leave, it’s a good idea. There are going to be crumbs and some food on your floor after Thanksgiving dinner. If you and your family walk around on those crumbs, they’ll get tracked around the house and embedded into the carpet. So to avoid creating more mess, do a quick sweep.

Decorate Your Way To A Cleaner Home

The Key to Low Maintenance Cleaning

Typically, we design and decorate our homes to fit our sense of style—and then those decor choices dictate our cleaning routines. We dust our open shelving weekly, and wipe down the marble countertop daily. But what if we reversed the process? What if our homes were designed to make cleaning them as easy as possible? The smallest design decisions can have a big impact on the way you live in your home — especially when it comes to keeping it clean! If your goal is a low-maintenance home that requires very little time spent cleaning, there are key decor choices to make.

Wall and Paint Finish

Avoid matte paint finishes if you have young kids or messy pets who are likely to get errant crayon marks and smudgy fingerprints on the walls. Instead, opt for the smoothest, shiniest paint finish that will look good—typically eggshell for walls and semi-gloss for trim. On glossier surfaces, dirt and grime can be wiped away more easily.

Similarly, if you’re considering wall paper, go with a vinyl wall covering, which can be wiped off with a sponge.

Floors

Select a hard-surface floor with as few seams as possible. Hard wood floors are a great option, but they can be vulnerable to spills. Stained concrete and vinyl floors are an excellent choice. They can be easily cleaned by sweeping or mopping and more resistant to dirt and spills—virtually nothing can penetrate to cause stains. If you want tile floors, use a dark grout. Or at least reduce the number of grout lines by using larger tiles.

Hard-surface flooring is easier to keep clean than carpet. Keep carpet for bedroom areas and other relaxed spaces where you’re likely to be barefoot (and not spreading whatever can be found your shoes). If you must have carpet, consider using carpet tiles. If there’s a spill, simply pull up that tile and clean it in the sink. If a tile becomes damaged, you can replace that single tile rather than having to replace all of the carpeting. Carpet tiles are perfect for kid’s rooms and play areas.

Incorporate Indoor-Outdoor Rugs, especially when using light colors. They’re easy to clean. Frequent vacuuming keeps dirt from embedding and they almost always wipe clean with a wet cloth, but can be deep cleaned with a hose! They’re also very pet friendly!

Lighting

Go with recessed or pot lights. Light fixtures and chandeliers can quickly accumulate dust and cobwebs. Recessed lights do require a light dusting sometimes but they are much easier to maintain and look bright and modern, especially in the kitchen.

Kitchens

Cabinets

Choose slab-front cabinets. Not only do they look modern and streamlined, but they are much easier to keep clean than cabinets with intricate moulding with lots of crevices to collect dirt and dust. Make your cabinets stretch all the way to the ceiling if you can. If there’s no room between the top of your cupboards and your ceiling, they’ll be nowhere for dust to gather.

Countertops & Backsplash

Grout can be a chore to keep clean. Eliminate grout lines all together by replacing tile backsplash with stone slabs or full-sheet metal. For the same reason, avoid using tile for countertops. Instead, go with large slabs of quartz, Corian, laminate, granite, or concrete.

Sinks

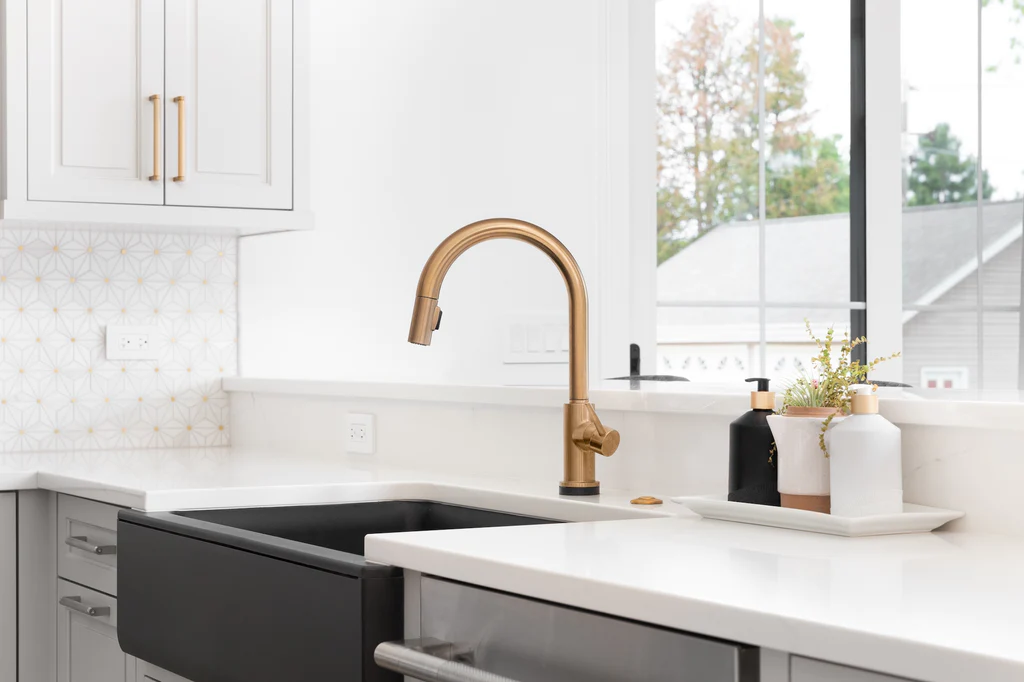
An integrated or under-mount kitchen sink makes it easy to wipe messes from the counter right into the sink. There are no seams to collect gunk.

Appliances

Consider stainless steel alternatives. Stainless steel appliances look great but smudge and show finger prints easily. If you don’t clean them up quickly, they look dirty pretty fast. Try covering your dishwasher and refrigerator with easy to wipe clean panels.

Bathrooms

Floors & Walls

As with the kitchen, fewer grout lines in the bathroom means less cleaning. Use large tiles for the floors and walls.

Toilets & Sinks

Wall-mounted toilets and sinks make it easier to clean all sides of the fixtures as well as mop under them. Choose a toilet that is either fastened to the wall the whole way from top to bottom, or leaves enough space to clean the circumference. And if you really like your loo to be spick and span, try finding one that has a removable seat. A wall-mounted faucet will allow water to drain down into the sink rather than that collect around the base of the faucet, resulting is less gunk build-up.

Showers

Replace an enclosed shower with a door-less shower. This will eliminate the need to clean glass doors or shower curtains.

Laundry Room

Locate your laundry room next to your bedrooms, on the same floor if possible, to make it less work to get the laundry to and from the washing machine, eliminating the need to carry heavy baskets of laundry up and down stairs. Another option is to install a laundry chute.

Furniture with Legs

When shopping for couches, credenzas, sofa and side tables (and really all types of furniture), look for those elevated on legs. Even better: cabinets that attach directly to the wall and suspended off the ground. This way, you’ll be able to easily vacuum or sweep underneath them. For a hands-free cleaning routine, invest in a robotic vacuum that can do all the cleaning for you.

Sofa + Seating

You can’t prevent spills from happening, but you can make life easier for yourself by choosing an easy-to-clean sofa. Upholstery makes all the difference when you’re searching for an easy-clean sofa. Leather is easy to wipe clean—just be sure to sop up spills right away and condition it once per year. If you prefer fabric sofas, look for those with stain-repellant treatments or stain-resistant microfiber. Otherwise, choose a slipcovered sofa, so you can toss the cover in the washing machine whenever it needs a refresh. Darker colors will hide stains better, but it might not be the best option if you have a pet with white fur.

Shelving

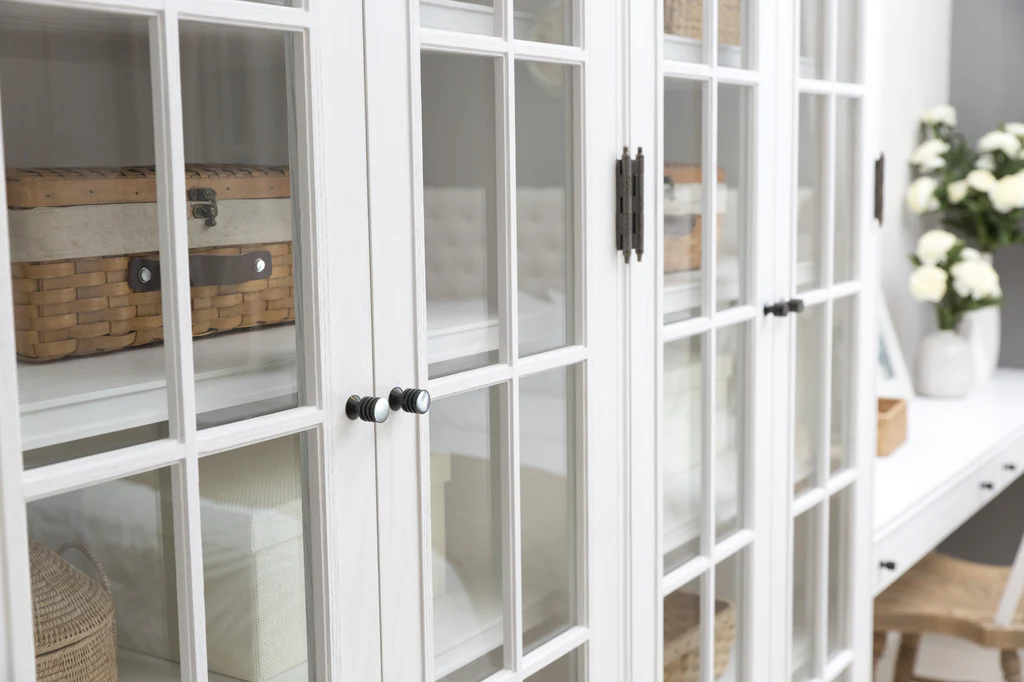
Skip the floating and open Shelving. Elegantly styled shelfies look enviable on Instagram, but in reality, they require a lot of extra dusting. For a speedier cleaning routine, stick with glass front cabinets so you can show off your favorite items while keeping them dust-free.

Accessories

Cushions & Throw Pillows

We tend to go a little overboard with the throw pillows on sofas, chairs and our beds. For easier cleaning, consider cutting back on the number of throw cushions. Less can still add the burst of color or warmth you are looking for. Plus you can make the bed faster!

Wall Art

Although a gallery wall with frames displaying family pictures and artwork can look great, you can probably guess that we are going to say… that it’s just more dusting to do! Instead, opt for a larger statement piece so there is just one frame to look after.

Storage and More Storage

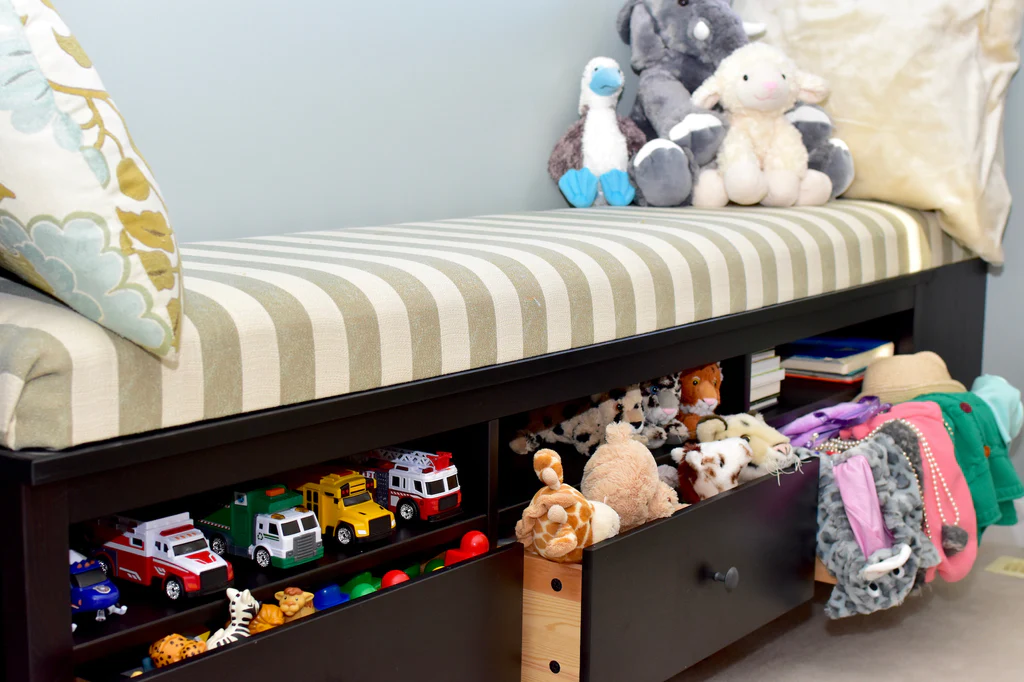
Incorporate built-in storage where ever possible throughout the house. Having a place for everything will help keep clutter from building up on surface areas. Things can’t be put away if there’s nowhere to put them, so always be keeping a lookout for sneaky storage opportunities like bench seating with built-in storage underneath or bedheads with shelving.

Shopping cart0
There are no products in the cart!
0